No subject scares underwater photographers more than having an expensive housed camera turn into an aquarium. Even a bit of water can turn electronics into a corroded mess.
Here are a few general tips on maintenance that should help you avoid finding Nemo in your housing:
1) Read the manufacturer’s instructions. Yeah, that little pamphlet you put your beer on while you unpacked your new baby. Wipe it off and carefully read through it. Housings all vary in care and feeding. For example, some housings use silicone gaskets that don't need silicone grease. Some o-rings are not removable but need to be wiped off. Some housings have controls that are user-serviceable, some don't. Just read it.
2) O-rings are probably the most important and miss-serviced parts. There are lots of the little buggers on uw cases. In addition to the large, noticeable o-ring on the back cover, every control has one or two, as well as the ports or strobe bulkheads. Some are black, some are blue, some should be serviced, and many should not.
Following rule #1, you can generally service the rear, port and bulkhead o-rings as follows. Remove them carefully by pinching the o-ring at the corner and pulling it out/off. If it sticks, use the corner of a credit card to gently pry it up. Your credit card will work great, since it won’t be of much use for anything else anyway after buying all of your photo gear. A blunted wooden cuticle remover also can also be useful, but do NOT use tweezers, screwdrivers, needle-nose pliers, vise grips or any other sharp, medieval devices.
Then just wash the o-ring in warm water with a bit of soap. Pat it dry completely with a lint-free dishtowel; NOT a paper towel or used Kleenex. Try not to stretch it as you dry it.
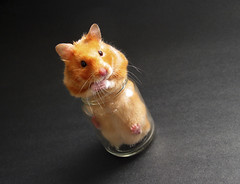
Examine the o-ring in a bright light. Use a magnifying glass if you're as old as I am. Look for dirt, cuts, dog, cat, rat, weasel and hamster hair. Be picky and meticulous; even the smallest hamster hair can ruin your day, and then you'll want to put the hamster in the housing and ruin his day. It really can get out of hand.
O-rings can get cut or abraded fairly easily as salt crystals form and slice them with their sharp edges. Replace them from your spares as necessary, and order replacements.
You do have fresh spares don't you? O-rings need to be stored in an air-tight bag away from strong sunlight. They get brittle with age, and should be periodically replaced.
If an o-ring is clean and in good shape, lubricate it with just a drop or two of the proper silicone grease. Do NOT use anything other than the grease that is from your housing manufacturer. For instance, using black o-ring grease on blue o-rings has been known to melt them, which generally results in you melting down when your housing floods.
Put a couple of drops on your fingertips and gently pull the o-ring through them to apply.
Now repeat the mantra; OMMM... "MORE IS NOT BETTER...MORE IS NOT BETTER...". Do NOT over grease. Silicone grease is ONLY a lubricant, NOT a sealant. All you want to see is sheen on the o-ring, not globs of grease. If you apply too much, all it will do is act as glue for sand and dirt to stick to.
3) Carefully clean the flanges and grooves where they contact the o-rings. Use foam swabs, or a cotton swab with a piece of lens tissue wrapped around the tip. Blowing them off carefully with a can of compressed air is ok, but try to blow the dirt OUT of the housing. Again examine all these surfaces carefully, they should not resemble "Beach Blanket Bingo" with sand everywhere, nor should there be any deep cuts or warping that would result in a bad seal. Do NOT apply grease to the flat surfaces.
4) Now carefully install the clean, greased o-rings, making sure they are not twisted and lay flat in their intended spots. If it seems out of shape, let it sit there for a minute, then try pressing it into place again. They can get heated and misshapen from your sweaty fingertips and enlarge slightly.
5) Install your camera with fresh batteries and carefully close your housing. Be sure that there's not a sync cord or the edge of a silica gel bag stuck in between the surfaces. If you have a clear housing, check to see that there is a solid line where the o-ring seals. Breaks in color usually mean hamster hair.
6) I wipe off copper electronic sync cord contacts with rubbing alcohol, and even use a bit of silicone grease on the threads when I install them. Then I leave the cord connected for the whole trip. The contacts are fragile and if it's working, it does not need to be serviced between dives. Covers need to be immediately put on sync cord ends; copper and salt air is a bad combination.
7) Be sure to try your installed camera with the strobe before you go diving. It’s easy to get something a little out of kilter, and nobody likes to hear bad words underwater.
8) A piece of thin sanitary pad usually fits in most housings and provides a bit of "oops a few drops got in" insurance. It’s a good idea to tape it and any silica gel packets in place with a bit of electrical tape. It’s really a bummer to see the words “Dry-z-Air” when you are trying to focus on a whale shark.
9) Always test your housing in the dunk tank on the boat. That's a plunge, swish-swish, watch for bubbles dunk...NOT a toss it in until I'm ready to dive dunk.
NEVER leave your camera in the rinse tank between dives, or for longer than a couple of minutes. MOST floods happen in the rinse tank. Cameras get dropped in on top of each other and latches get sprung, etc. Scratched ports are the least of your worries. Also, during your dive the housing and controls get compressed. Coming up from the bottom and then putting the camera in a non-pressurized tank of water can allow some controls to weep a bit. So just rinse it well, take it out and leave it under a towel between dives.
NEVER let anyone clean their mask out in the camera rinse tank. Anti-fog solutions have been known to be hard on o-rings. Gently prod the offender with your dive knife as you inform him of this fact, it’s usually effective.
10) Dried salt water is your housing’s enemy. Salt crystals form in the controls and they can cause leaks. If you don't have access to a fresh water rinse, leave it in salt water. As long as it doesn't dry, it's fine. Soak it thoroughly at home in warm fresh water.
Once a year or so you should send your housing into the manufacturer's repair center for servicing. Those small o-rings in the controls generally are not user-serviceable and need periodic replacement. Springs and controls get worn as well. Don't just pack the housing and take it on a long trip without checking the system on a test dive first.
The above doesn't have to take a long time, and a complete cleaning is not necessary every dive, but take your time and examine your housing carefully before you get in the water.
And watch out for those pesky hamsters.
--------------
Want to Make Sure? Considering a new housing? Just a thought (ok, shameless plug ;-) ). Fantasea housings come with 1 year of free flood insurance. When a customer has a problem, DEPP replaces their camera and Fantasea fixes or replaces the housing. Doesn't make up for a lost vacation, but it helps. The FP5000 for the CoolPix P5100 is an awesome combo.
--------------
Jack Connick is a Seattle diver and graphic designer who always wanted to be a photographer. He has traveled extensively around the world, logging over 800 dives in ten countries.
His company Optical Ocean Sales.com, is an authorized dealer for Fantasea Line and other underwater photography products.
Visit and join his free Cold Water Diving Flickr photo group.

Underwater Photography News, Reviews and Trip Reports from Optical Ocean Sales.
Wednesday, December 12, 2007
Tuesday, April 3, 2007
Look Honey! It's Diver Jack!
 My aquarium dive buddy Tim and I were walking back to our cars after "performing" our feeding show at the Seattle Aquarium today. I worked comms and topside support as I had wanged my eye with a strobe cord yesterday (don't ask), nothing serious, but no diving for a couple of days.
Tired and laden with wet gear I suddenly heard a woman in very excited tones say, "Oh look, it's Diver Jack! Honey, it's Diver Jack. May we take your picture?" Huh? Me??? What'd I do??
Diver Jack is my stage name. We now do feeding shows, talking to the audience, taking questions and showing off the wolf eels and animals when we feed them. The wolfies are my pets and will sit on my head to eat squid. We use full-face Aga masks and comms with surface-supplied air. As part of that, we wave to the crowd, talk to kids, and get people involved, so that we can impart a conservation message.
But I never thought I'd have groupies!
My groupie was cute as a bug, pretty in pink, and about 3 years old. Very excited, Mom asked to take my picture with her daughter Gretchen. I taught Gretchen how to make an "ok" sign. She was so excited she could hardly talk. So was I.
They promised to come to other shows, and it seemed we had both made our afternoons.
Thursday, March 29, 2007
Five Tips for Better Underwater Photography
This is the second monthly column written for NW Dive News Previous column: Getting Started in UW Photography
Got a new underwater camera? Photos not quite up to snuff? Here are 5 quick tips to help you out.
Tip #1. Get close, have a conversation. If you think you are close, get closer. Two to four feet away is where most digicams shine. Many have a macro setting that can focus the lens from 1" to 4'. That’s the setting to use most of the time, as it is the perfect range for your strobe and for best sharpness. Remember that the more water you have between the camera and the subject, the less sharp and vivid your shots. But be careful in getting too close, there is a point where cameras cannot focus, check your manual.
Try to capture the head and eyes of your critters. Have a conversation with them, just like when you meet someone and shake hands.
Tip #2. Shoot up. Use the available light to help light your backgrounds for "reefscapes".

Tip #3. You can't light everything. In combination with Rule #1 & 2, try a type of shot called a close-focus, wide-angle.
Get close to say one fish, a nice outcropping of coral, or an anemone. Light that with your strobe. Point at an upwards angle, setting your camera on auto, or meter the water column and select a slower shutter speed (not any lower than 1/60th) to let the available light open up the background. Center the subject and take a half squeeze on the trigger to focus. With your finger still holding the half-press, re-compose with the subject close and to the side, maybe lower in the frame. Hold your camera steady and squeeze the trigger the rest of the way. Now you have a nice shot of a subject and it's environment giving greater depth and drama.
Tip #4. Macro. To get a nice black background, use your strobe in TTL, or auto, and increase your shutter speed. Set it as fast as possible, with a low ISO for sharpness and the strobe as close as possible to the subject for the best color saturation. You may have to turn the power down and use a diffuser to soften the light.
The background is always controlled with shutter speed. Want to open it up? Shoot slower. Want it blacker? Shoot faster. Can't get what you want? Adjust strobe power or position so you can work with it. Close in is where TTL usually shines. If you’re shooting in mid-water, you'll do better with manual strobe settings.
 Tip #5. In-between. What about fish portraits and buddy shots? Set your camera to manual, or on program mode. Set an aperture somewhere in the middle (maybe f4) and shutter speed to as slow as you can hold, usually about 1/60th. Increase the strobe power or use TTL/auto.
Set the ISO as slow as possible. Remember, higher ISO means more noise, seen as fuzziness. Set it at ISO 100, or lower, for macro. For other shots, try to not go above 200 to 400.
On digicams where you don't need the depth of field, the middle aperture setting (f4) gives the best sharpness. This is due to the very small actual apertures on these lenses and the way light waves pass through them.
Tip #6. Break the rules! Hey, you said 5 tips. Well, the sixth is simply to break the rules. Try things out. Experiment. Many times the best shots come from bending, breaking, and creating your own rules. Look at your mistakes carefully, learn from them and try another variation.
Have fun with underwater photography, the more you shoot, the better your shots will get!
--------------
Jack Connick is a Seattle diver and graphic designer who always wanted to be a photographer. He writes a blog, Optical Ocean on diving, sailing and underwater photography, and has traveled extensively around the world, logging around 700 dives in ten countries.
His company Optical Ocean Sales.com, is an authorized dealer for Fantasea Line and other underwater photography products.
Visit and join his free Cold Water Diving Flickr photo group.
Sunday, March 11, 2007
Junkyard Dogs
Randy, Jim and I dove the wickedly tricky Alki Junkyard on a photo op yesterday around 4pm. The rain had let up and conditions were quite easy. Parking even became available as we pulled up.
An easy swim out to the white buoy with a blue stripe landed us in junkyard central. I have to say this is one of the best macro sites I've seen around here. It was loaded with small fish, anenomes and most of all - nudibranchs!
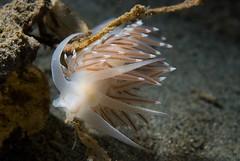
I quickly spotted Janolus fuscus, Flabellina trophina, and found a very cool Armina californica out on the sand. Or; a clear one with yellow dots, red with white dots and a striped nudibranch. The later is one I'd never seen before, mostly because it is a burrowing nudibranch that feeds on sea pens. Even stranger is that it has no external gills on its behind like most do.
Everything was pretty small though; many the size of a quarter or half dollar. I could of used a 100mm macro lens as opposed to my new 60mm I was trying out on the new D80/Fantasea rig.
The current picked up while we were out and shooting out on the flat became hard. Everything wanted to go into the current and I couldn't get ahead of it to get "face" shots. But there were a few piles of junk that you could hide behind, and I found some scaly-headed sculphins there, always a crowd pleaser with their green eyes.
We spotted lots of crabs and shell middens, but no octos, but they sure looked like they'd been around recently. Also spotted "dinner" several large male dungeness crabs up in the shallows.
We didn't go far up into the current, staying at 50' or so the entire dive as a result we had a long hour dive, Randy did 70 mins.
This is a great photo friendly site with easy access, no rocks to trip over and a wall to set your rig on after the dive.
Photos are here.
An easy swim out to the white buoy with a blue stripe landed us in junkyard central. I have to say this is one of the best macro sites I've seen around here. It was loaded with small fish, anenomes and most of all - nudibranchs!
I quickly spotted Janolus fuscus, Flabellina trophina, and found a very cool Armina californica out on the sand. Or; a clear one with yellow dots, red with white dots and a striped nudibranch. The later is one I'd never seen before, mostly because it is a burrowing nudibranch that feeds on sea pens. Even stranger is that it has no external gills on its behind like most do.
Everything was pretty small though; many the size of a quarter or half dollar. I could of used a 100mm macro lens as opposed to my new 60mm I was trying out on the new D80/Fantasea rig.
The current picked up while we were out and shooting out on the flat became hard. Everything wanted to go into the current and I couldn't get ahead of it to get "face" shots. But there were a few piles of junk that you could hide behind, and I found some scaly-headed sculphins there, always a crowd pleaser with their green eyes.
We spotted lots of crabs and shell middens, but no octos, but they sure looked like they'd been around recently. Also spotted "dinner" several large male dungeness crabs up in the shallows.
We didn't go far up into the current, staying at 50' or so the entire dive as a result we had a long hour dive, Randy did 70 mins.
This is a great photo friendly site with easy access, no rocks to trip over and a wall to set your rig on after the dive.
Photos are here.
Tuesday, January 30, 2007
Getting Started in Underwater Photography
I’ll be writing a monthly column for Northwest Dive News on underwater photography, one of the most popular activities in diving today . I’ll be concentrating on cold-water dive photography which has it's own set of skills and equipment. Tips, tricks, gear and local dive sites, I’ll try to touch on them all and more.
I’ll re-print them here monthly in my blog, with a little more room for explanations and photos.
Your Experience Level and Guarding Against Task-Loading
Before we "dive" in, lets do a quick review of dive skills and experience necessary for your safety and the protection of the natural environment that you want to photograph. You need to have excellent buoyancy skills with intuitive, well-practiced, abilities as a diver to get into dive photography. I feel that it takes most new divers between 50-100 cold-water dives, because you will be adding a lot of task-loading and additional skills.
Not having this experience can result in damaging a reef, or more dangerously, an unsafe situation for you. You should feel that diving is intuitive to you and not have to think about it too much.
That doesn't mean that you can't buy your camera and become just as intuitive with your camera skills while you gain diving experience. It's a little tough to read a manual when you're 60 feet under water, so knowing your camera well really helps.
A hidden danger to a dive photographer, particularly in cold-water, is task loading beyond your experience level, or what the diving conditions can dictate. If in doubt, leave the camera topside, explore and shoot another time. Dive safety and protection of the underwater environment must come first!
Getting Started
Diver-photographers are faced with a bewildering assortment of cameras and options when it comes to buying a camera. Digital camera technology seems to change every day. Rather than just buying something that looks cool, or that a salesman recommends, I’d suggest a more methodical approach.
My Recommendations
I generally recommend a camera and housing as opposed to an amphibious camera, or dedicated camera/housing solution. Canon, Olympus, Fuji and Nikon build an amazing amount of cameras and many can be used very successfully underwater in a housing. The competition between these companies means that their feature-sets and technical advances are changing much faster than dedicated underwater cameras. Plus, there are more housings, external equipment and third-party solutions available, that can be moved to an upgraded system later. Simply put, they are a better value and can be used well above water too.
There are some very good, dedicated amphibious cameras; some have good controls and a sharp lens. They are smaller to carry and simpler to use, but you'll be at the higher price range to get the control and quality you want. I think housed systems offer more quality for less money.
My company Optical Ocean Sales.com, is an authorized dealer for Fantasea Line underwater photography products, which makes housings for Nikon CoolPix digicams and DSLR housings for Nikon, Canon and Olympus. I really like the CoolPix P3 and the Nikon D80 or Canon xTi 400 for underwater use.
Make sure whatever camera you buy, that you have as much manual control as possible. Why? Because most automatic camera features are not designed for the low light conditions you find underwater. Also with an external strobe, you’ll need to use manual or aperture/shutter priority modes to adjust your strobe exposure.
Whatever camera you have, my best advice is to get out there and shoot! Practice does make perfect!
Next Column: 5 Tips for Better UW photos
I’ll re-print them here monthly in my blog, with a little more room for explanations and photos.
Your Experience Level and Guarding Against Task-Loading
Before we "dive" in, lets do a quick review of dive skills and experience necessary for your safety and the protection of the natural environment that you want to photograph. You need to have excellent buoyancy skills with intuitive, well-practiced, abilities as a diver to get into dive photography. I feel that it takes most new divers between 50-100 cold-water dives, because you will be adding a lot of task-loading and additional skills.
Not having this experience can result in damaging a reef, or more dangerously, an unsafe situation for you. You should feel that diving is intuitive to you and not have to think about it too much.
That doesn't mean that you can't buy your camera and become just as intuitive with your camera skills while you gain diving experience. It's a little tough to read a manual when you're 60 feet under water, so knowing your camera well really helps.
A hidden danger to a dive photographer, particularly in cold-water, is task loading beyond your experience level, or what the diving conditions can dictate. If in doubt, leave the camera topside, explore and shoot another time. Dive safety and protection of the underwater environment must come first!
Getting Started
Diver-photographers are faced with a bewildering assortment of cameras and options when it comes to buying a camera. Digital camera technology seems to change every day. Rather than just buying something that looks cool, or that a salesman recommends, I’d suggest a more methodical approach.
- What do you want to do with your photos?
Use them on a website or in emails? Print snapshots, or large wall-prints? Maybe see your work published? - How much do you want to grow your system? Are you starting out with a digicam and thinking about growing into a DSLR system later, or is your use more casual, capturing a few shots from a dive trip for fun?
- Where are you going to be shooting? Tropical or cold water? Working controls with gloves on, strong strobes and having durable equipment is important here in the Pacific Northwest. In tropical waters a lighter, smaller system may work fine for you and be easier to pack and carry.
- What do you like to shoot?Macro? Fish-portraits, maybe a close up of your buddy? Or do you want to “shoot up the reef” and do wide-angle shots?
- Do you want a camera for above-water, as well as underwater, use? How well supported is it, can it take good top-side photos as well?
- How much are you planning on upgrading in the near future?What strobes will it connect to? External lenses and other add-ons? Can they be used with other cameras and systems?
And, oh yeah, how much are you able to spend? This is not a cheap hobby, and you pretty much get what you pay for.
My Recommendations
I generally recommend a camera and housing as opposed to an amphibious camera, or dedicated camera/housing solution. Canon, Olympus, Fuji and Nikon build an amazing amount of cameras and many can be used very successfully underwater in a housing. The competition between these companies means that their feature-sets and technical advances are changing much faster than dedicated underwater cameras. Plus, there are more housings, external equipment and third-party solutions available, that can be moved to an upgraded system later. Simply put, they are a better value and can be used well above water too.
There are some very good, dedicated amphibious cameras; some have good controls and a sharp lens. They are smaller to carry and simpler to use, but you'll be at the higher price range to get the control and quality you want. I think housed systems offer more quality for less money.
My company Optical Ocean Sales.com, is an authorized dealer for Fantasea Line underwater photography products, which makes housings for Nikon CoolPix digicams and DSLR housings for Nikon, Canon and Olympus. I really like the CoolPix P3 and the Nikon D80 or Canon xTi 400 for underwater use.
Make sure whatever camera you buy, that you have as much manual control as possible. Why? Because most automatic camera features are not designed for the low light conditions you find underwater. Also with an external strobe, you’ll need to use manual or aperture/shutter priority modes to adjust your strobe exposure.
Whatever camera you have, my best advice is to get out there and shoot! Practice does make perfect!
Next Column: 5 Tips for Better UW photos
Monday, January 8, 2007
New Flickr Group: Cold Water Diving
I've started a Flickr group to discuss and post photos taken in temperate to cold water conditions. Dealing with a dry suit and shooting photos can be tricky. What are your tips and tricks? Post your best shots!
It is public, but you have to be a Flickr member to join.
Flickr: Cold Water Diving Group
Jack
It is public, but you have to be a Flickr member to join.
Flickr: Cold Water Diving Group
Jack
Subscribe to:
Posts (Atom)