The Olympus TG-5 camera and housing packages have been very popular with a wide variety of divers. The camera shoots great stills as well as 4K video. It has Olympus PT-058 housing, or the Ikelite and Nauticam housings give protection to 140', 200' and 300' respectively.
underwater preset modes for snapshot, wide angle and other modes that make life easy. As well it has amazing macro modes that can let you shoot the small stuff with ease. All this in a rugged, camera that's drop proof, freezeproof, and water resistant to 50'. The
Having a lighting system that can shoot both stills and video gives the widest possible use of this great little camera. The new Kraken Hydra "S +" lights that now come in a 2500, 3500 and 5000 lumen models, as well as the popular Kraken Macro Ringlight 3000, all support a higher lumen output in a fast "burst" mode that saves power and gives a higher output for still photos. You connect up the camera to the light with a fiber optic cord and the onboard flash triggers the light.
The light is much brighter in "burst" mode, up to 7000 lumens on the Hydra 5000. However it still doesn't give the instant, super high intensity light that freezes the subject and gives high color saturation that a strobe can. But for general use where you want to shoot video and stills they are a great option.
The Kraken Hydra lights come with mounts, case and charger and feature a sealed light head against flood damage. Besides utilizing the burst mode you can also control them with a fiber optic connection to a handy remote control.
Optical Ocean Sales has a wide selection of packages from single compact to complete dual "ultimate" systems that come with one or two lights, trays and wide angle lenses.
Setting up the TG-5 Camera with Kraken Hydra Lights
The following set-up is for the Olympus TG-5 but also will work with most other cameras, however specific menu items and locations obviously will be different.
Setting the camera to the underwater scene modes works fine. However in underwater snapshot mode on the TG-5, there is no selection possible for fill flash. The other underwater modes do have that flash mode, and should pre-select it for you. If you need to adjust the camera exposure, you can use the +/- exposure compensation, or adjust your ISO. Do not use auto-ISO.
There is a manual flash mode on the TG-5 that will work in all modes. This may be the best idea, as you can turn the flash power down and just use it to trigger the strobe.
To select manual flash mode, press the flash button, then select "Full", then press "Info" and turn the power down maybe to 1/20th (but not all the way) with the left/right arrow buttons. This will save your camera battery.
If you want more control over the camera, then use aperture priority or program modes. This is recommended for macro modes. Set the camera flash to fill or manual as above.
The Kraken light needs to be on, with the right button held down until it starts flashing. You can shoot stills or video in that mode from the white flood mode. You can also use the red or uv modes of the Kraken light and take "burst"
white light flash stills. While in normal mode, push the left hand button on the light a few times to red or uv mode. Then hold down the right button until the colored indicator lights flashes, showing that the light is in burst mode. If you then press the right button, it will flash high intensity white, like a "test" button on a strobe, then
switch back to red to use as a focus/target light. This is a good mode for night or around shy critters like squid, crabs, octopus, etc.
Press and hold the left hand button sleeps the light. Holding both buttons down turns it off.
By Jack Connick
Nikon’s new D850 full-frame camera is proving to be one of their most popular cameras ever, and what’s not to like? A massive 46MP sensor with resolution that matches or exceeds film, fast autofocus (AF) borrowed from the pro-level D5, low base 64 ISO to better capture bright scenes and a fast 7 fps frame rate with an electronic front curtain shutter, for just a start. Matching that are improved flash electronics, TTL protocols and 4K video. For those D800 and D810 underwater photographers who fell in love with shooting full-frame images, the upgrade is intriguing.
I’ve shot many different cameras underwater, from small compacts and several Olympus mirrorless models, to other Nikon DX DSLRs. The Nikon D500 (review here), certainly is one of my favorites. Snappy performance and
incredible low-light focusing make it ideal for many underwater photographers, especially for macro and black water. But I really fell head over heels in love with the incredible dynamic range of the full-frame D800. (See comparison article.) As slow and heavy as it was, it still solidly cranked out some amazing shots. But the technology and electronic features of these cameras changes quickly and I was ready for a faster, newer generation.
Heard, but Not Seen?
The new Nikon D850 FX camera hit the streets last fall, and while everyone has been waiting impatiently, due to its popularity and Nikon’s low production levels, most would-be buyers haven’t been able to find one. In a rare event, housings were available almost immediately. For my first trip to Fiji in December with the D850 it meant that I had to rent a body.
I use LensRentals.com a lot for these sorts of situations, as it’s a great way to “try before you buy” for cameras and lenses. By the time we left for my second trip to Yap and Palau this spring, I was able to buy a D850 body. Between the two trips, I now have around 60 dives on the new D850 and Nauticam housing system, and love it!
It’s Just Zippy
The D850 really is a different beast, owing more to the pro level D5 than anything else. It’s much faster all the way around – AF, electronic shutter, frame rate, buffer and processor. Just zippy. While the D800 felt and acted much more like a film camera, the D850 is much more modern in every respect. It feels a lot more like a cross with the mirrorless cameras in that way. There are also a lot of new features, such as a swiveling touch screen, that are very nice to use above water. Nikon also swapped the position of the ISO and Mode buttons, which was a great idea, as I tend to change ISO constantly when shooting an FX camera.
It does have several function buttons and custom settings, but they are not as programmable as the Olympus E-M1 MKII. That said, there are plenty of functions available to make your life easier underwater. For instance, assigning the flash sync setting to F2 allows you to switch from TTL to manual (by using 1/250th sec FP) when using the Nauticam Technics TTL board in the housing. I also assigned the “My Menu” selection to F1, which gives you fast access to the first item on the list.
Lens Quality & Calibration
The image quality (IQ) of the D850 is tremendous, but I struggled a bit to get the focus just right on my first trip to Fiji. It seemed to back focus a bit and trying to catch a single focus spot wasn’t always successful. I found that the uber-high resolution D850 requires the AF to be closely calibrated with lenses, as it less forgiving of lens quality and focus than other models.
Fortunately, most Nikons allow you to add a precise calibration adjustment to the camera for each of your lenses. I found that even with my wide angle Sigma 15mm FE lens, with a huge depth of field, a couple of small adjustments made a big difference in picture quality. Although Nikon has an automatic calibration routine to do this, I couldn’t get it to work consistently, and ended up using an old school set-up of shooting a ruler at a 45° angle.
Released at the same time, Nikon’s new 8-15mm FE lens seems to be the go-to lens for close focus wide angle shots, but after I got the Sigma calibrated, I found it shot very well on the D850 and is quite a bit less expensive. I shot it behind a Zen 170mm dome, which yields excellent corners and quality. Nauticam's 140mm FE dome has also been optimized for these lenses and is slightly smaller with a removable shade.
A popular configuration of the Sigma 15mm FE and the Kenko 1.4 teleconverter didn't work out well. The depth of field was very small, so trying to do a "wide angle macro" shot resulted in unpleasing out of focus backgrounds. The exceptional resolution of the camera desn't allow for much leeway.
For a mid-range zoom, I’ve used a 17-35mm lens for quite a while as I like it’s f/2.8 speed. On the D800, I could cheat a little and use the smaller 170mm dome if I cropped the corners of the photos.
Not so on the D850. Not surprisingly IQ was terrible with the smaller dome. For these mid-range zoom lenses, you have to use a large glass dome port – I used the Saga Dive 230mm (9”) dome along with a 70mm extension and zoom gear.
To further improve quality, I also used an internal Sea & Sea M77 Correction Filter to reduce distortion and soft corners even more. This is a little discussed piece of gear, but really improves these mid-range lenses. I felt the images turned out great with this combo. I actually liked diving with the larger dome port, it balanced the rig out and improved camera handling, and even in the higher currents found in Palau, I didn’t find its size to be an issue.
For macro, I use the standard Nikon AF-S 105mm VR macro lens for most situations. In Palau I tried shooting my Nikon 60mm Micro lens in order to gain reach while shooting sharks and big animals that were shy. I tried this lens behind my 170mm dome with an extension, and it turned out great - as long as the visibility was good, as you are stacking up water. I really liked the versatility of being able to grab shots of shy sharks, small schools of fish, and macro shots with this one set-up, and used it quite often.
Focusing In
A lot has been written about the D850’s AF speed and modes. Several photographers suggested using the camera in AF-C (continuous focus) mode, rather than AF-S (single focus) mode. I’m old school, and most of the times I try to dumb these cameras down to a single spot with AF-S focus mode. The D850 is one of the first cameras where I liked to shoot in group AF (other than macro) and with AF-C (continuous focus) activated. I hardly ever had an out-of-focus shot. It definitely is also fast to focus and worked well in low light situations. However, in my experience it’s a bit slower in low-light than the D500, but not by much.
Swing Low
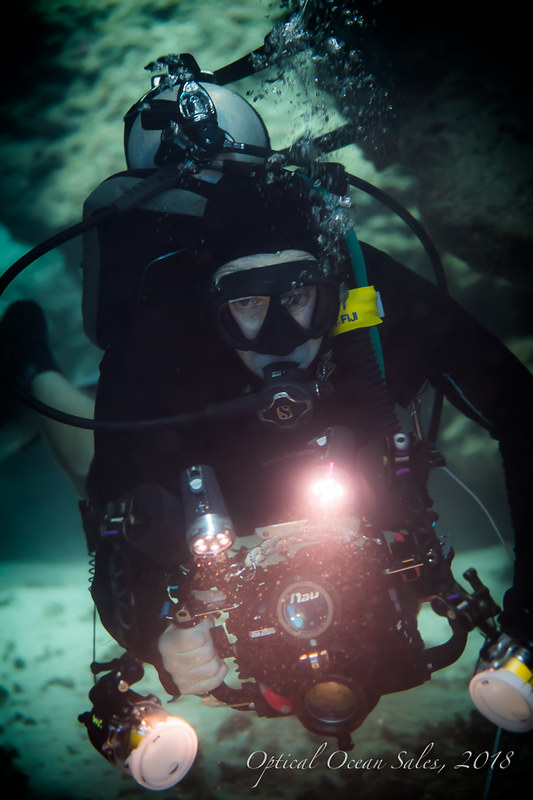
As one might expect, the D850, like most FX cameras has just tremendous low-light capabilities and you can easily shoot at ISO 2000 or above with no issues. Coupled with it's much improved AF, it makes shooting in caves, or dark situations easily achievable with just available light. This is another one of the really great improvements it has over the older D800/D810 models.
Battery life is good, as you are no longer using a pop-up flash to trigger your strobes. With a fast 128GB XQD card installed, I did 4 dives or more without needing to change batteries or cards.
Live View shooting is much faster. Gone are the long delays, and at times I found it useful, although I like the bright optical viewfinder much better.
Video
I did shoot a bit of video. The camera has been improved to shoot in 4K, with many nice on-screen controls, like focus peaking. Whole sets of video controls can be set up and accessed at the flip of a switch.
Nauticam NA-D850 Housing
I also found many nice improvements and differences between the Nauticam NA-D850 the older NA-D800 underwater housings. Having used many Nauticam housings over the years, it’s great to see continuous improvement from model to model.
Not surprisingly, the new D850 housing is shorter than the D800 model, as there is no pop-up flash or tall “bell” to hold it. The width of the housing is about the same.
The biggest surprise to me was the weight difference – one full pound lighter! While all housings can be made to be more neutral underwater with the addition of floats, the mass remains the same. Swimming one less pound of mass around makes quite a difference in handling.
I was using two Sea & Sea strobes and shot a lot in TTL on both trips. However, I almost always shoot larger animals and other wide-angle in manual, as these situations don’t reflect enough light to the camera to adjust TTL triggering very well.
The newer Nauticam Nikon housings now use electronic Technics LED trigger boards that take up very little room, a manual version comes standard. I found the optional Nauticam TTL board and found it to be quite accurate – better than what I was used to when I had used the D800’s onboard flash. I could also adjust the ev on the strobes accurately. I normally shoot with +.3 ev dialed in, as I almost always want a bit more light, and this gives the strobes a better TTL range.
For the most part, the TTL board was very accurate and determined good exposure. However, I found it vastly under exposed shots with too much contrast across the frame, such as an overhang with soft coral and a bright sky behind it. Switching to manual strobe control in those situations worked fine, and with the function button set up I could switch the strobes from TTL to manual, or even off/on, with a press of a button.
The rest of the controls on the Nauticam housing are designed with ergonomics in mind. Having produced housings since the Nikon D90, Nauticam has it figured out. They are all easy to reach and adjust, and fall right under your fingers, although I’d probably vote for the ISO lever to be a little bit more prominent; sometimes I couldn’t quite find it without looking.
As the D850 camera has a flip-up viewscreen, Nauticam matched that with a mounting tray that tilts the viewscreen to 15°, making it much easier to view.
Standard features include the famous rotating port bayonet lock and vacuum check system – now with a push button valve with a front reset button. These make diving much less stressful when taking such an expensive camera underwater.
So, is it worthwhile to upgrade from a Nikon D800 or D810 to this new beast - the D850? I struggled with this, as these FX systems are expensive, but my verdict is a decided yes.
The D850 camera is much faster, shoots easier, and has improved functionality with just plain incredible IQ all the way around. I like it much better than the D800, both above and below the water.
The new Nauticam housing adds even more to the mix; smaller, much lighter, with improved controls, electronic strobe capabilities, and vacuum leak check systems. The combination is extremely powerful.
The secondary market for used D800/D810s is remaining reasonably strong, so an upgrader can expect to outlay less than they think after all is done.
I feel the Nikon D850 is the upgrade that everyone has been waiting for and will redefine this pro-level camera market segment.
Dropping into the warm, crystal clear water we spotted at least 3 or 4 species of sharks all in good numbers. We were on a shark dive on the remote outer reef of the Micronesian island of Yap. Grey reef sharks of moderate size, lots of smaller black tip reef sharks and quite a few larger silvertips were nosing around us looking for their afternoon snack. Good for us it was a small “chumsicle” of frozen fish, which they eagerly attacked on the bottom. For the next 45 minutes we excitedly clicked away and enjoyed the show. While the sharks were definitely curious about us, they kept their distance. Certainly, a great dive.
After many hours of flights on through the night and day, fifteen of us had arrived early in the morning the day before to this small island paradise for the first stop in our 2018 OOS South Pacific Photo Expedition.
Manta Ray Bay Resort on Yap was very well-organized and had us in our rooms quickly and up and diving by late morning the next day. The hotel is getting old now, and while it could use some updating, was spacious and comfortable. Meals were taken in their converted wooden sailboat anchored permanently on-site. They were surprisingly good, with lots of choices, even pizza!
Yap Divers had excellent facilities featuring “VIP” service where they take complete care of all your gear other than your wetsuit. There was a large camera room, and rental dive gear was available. The guides were excellent, and nitrox fills were included in our 3 dives a day package.
The diving in Yap is nearly all hard coral on fringing reefs. This mostly necessitated long boat trips out through the mangroves, and winding channels along pristine coral reefs out to the blue.
The first day was somewhat cold and raining hard to our surprise. It meant we had to go pretty far out to get away from the run-off and green water. The hard coral reefs and walls were pretty, and the geography spectacular underwater, but besides fish, there was little invertebrate life or colorful soft coral. Still the dives were fun, well run and organized which made my job as group leader easy.
The next day we ran out to see if we could find some mantas, as Yap is noted world-wide for these huge gentle fish. The mantas there are mostly “reef” mantas, and smaller than the large pelagic versions, but quite numerous. Or so we’d been told. The green water runoff to the lagoon made visibility pretty poor and the mantas stayed home.
The following day we went back and after waiting nearly 45 minutes, we were finally rewarded with a couple of mantas dancing around our heads for 10-12 minutes and we nailed a few keeper photos. Along with the shark dive that afternoon, we had a great day of it.
After more dives in clear water, and a fun tour and picnic on the Manta Bay Resort’s private beach, we were ready for the next leg of our trip to Palau.
United Airlines in their wisdom has decided that you can’t just take the old short “hopper” flight directly from Yap to Palau. You now have to return to Guam, wait most of a day, and then fly to Palau. This is a lot less than convenient, and Guam is not my favorite place to hang out. And of course, the street in front of our airporter hotel was blocked by a once-a-year marathon race and we had a heck of a time getting to it.
But all the logistics worked out, and we arrived in Palau later that evening and were met and taken to the Rock Islands Aggressor for our week’s long trip around the islands there.
This was the second OOS Aggressor Palau trip and having enjoyed a great trip 3 years ago, it seems like Palau is one of those destinations that bear repeating. I think what is most interesting from a photographers’ perspective is the shear diversity of shots and situations you encounter, from pristine walls and reefs, sandy “bommie” covered bottoms, unique dives in German Channel, the caves and caverns of Blue Hole and Siaes Tunnel and world-famous high current dives on Blue Corner, Big Drop Off and outlying walls on Peleliu.
Besides all the great reef and wall diving, there’s also a multitude of WWII wrecks and every dive has surprises; sharks everywhere, mantas, eels, huge schools of every fish imaginable, and lots of macro and invertebrate life.
Which is pretty much what we enjoyed that week on the Aggressor! These boats are huge catamarans, created as dive boats and are very comfortable. We were short a few divers, so the fifteen of us spread out a bit in the eighteen-passenger boat.
The dive deck is a bit smaller than you’d think, as all the tanks and dive gear other than your mask and wetsuit, stays on the auxiliary hard boat dive skiff. Divers just walked on board the skiff, loaded up cameras and the skiff is lowered into the water on a hydraulic lift! No death-defying leaps into inflatables, or difficult to crawl up ladders. We also could all backroll into the water in two groups, which meant that we could get our entire boat load into the water in a couple of minutes. A definite plus for bluewater, high current dives.
They’ve gotten rid of the large circular camera table that wasted a lot of space and replaced it with 3 long tables with 2 shelves which work out much better. Besides a comfortable lounge and bar (with free beer and wine), there’s also dinette tables. Meals on the Aggressor have improved from their already good service to absolutely outstanding! Our chief prepared breakfasts to order, lunches with lots of great selections like sushi, pizza, salads, soups, and mouth-watering fine dining dinners served at your table. I felt like they had really stepped up their food from the last trip.
The cabins were generally comfortable, and the a/c now well controlled (many boats don’t have good thermostats). I think the only drawback to the layout of the Palau and Rock Island Aggressors is the old-style bunk bed cabins. They’re fine for couples, with a larger double below but for singles, they are uncomfortable as older customers don’t like the climb up to the narrow upper bunks. We also had some smelly holding tank issues with the boat showing its age, but, to be fair, it was going into annual maintenance the following week.
But back to the diving. One of the problems with Palau is that it’s a bit over-loved by close-by Asian nations. These groups tend to be culturally exclusive and use their own hotels, dive operations and guides. As groups they also aren’t usually the most experienced divers. The day boats have long rides in the morning and afternoon, so the good thing is that from a liveaboard it is easy to avoid these multitudes of divers by being able to dive earlier and later in the day. Or we could get to outlying dive sites, not accessible for the day from Korror.
For divers wanting a more remote experience, it’s getting harder to find on Palau. Several times we were over-run by these eager, but inexperienced groups, or had to wait for them to leave the sites before we could dive. But we got lots of dives in and were able to do 4 dives a day, with a few night dive opportunities as well.
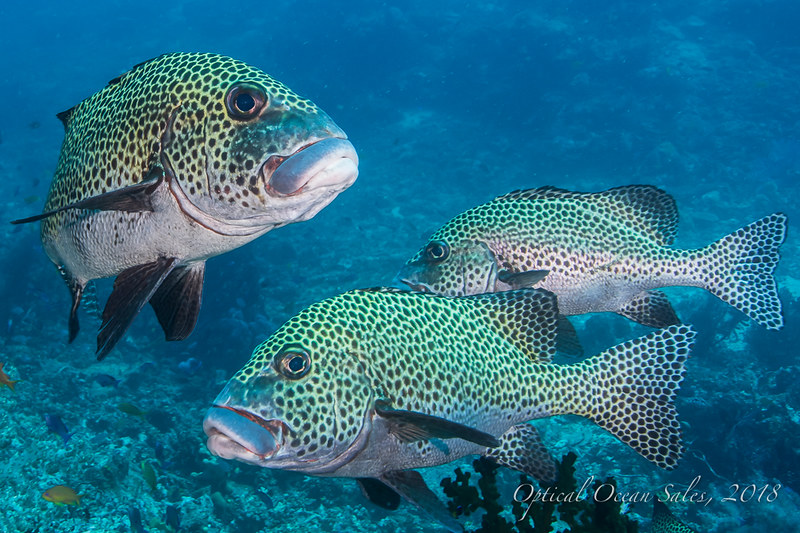
We had an outstanding dive on Peleliu with the clearest visibility of the trip. We lucked out and were able to experience the once-a-year mating congregations of long-finned snappers with thousands of fish moving along the bottom of the wall like a freeway, then bunching up and forming a vertical mass. We had the same luck finding a once-a-month congregation of bump-headed parrot fish with hundreds of the large fish massing together and shooting to the surface spewing eggs and sperm. It all happened so fast it was nearly impossible to take photos of, but they were a very unique experience that we all enjoyed.
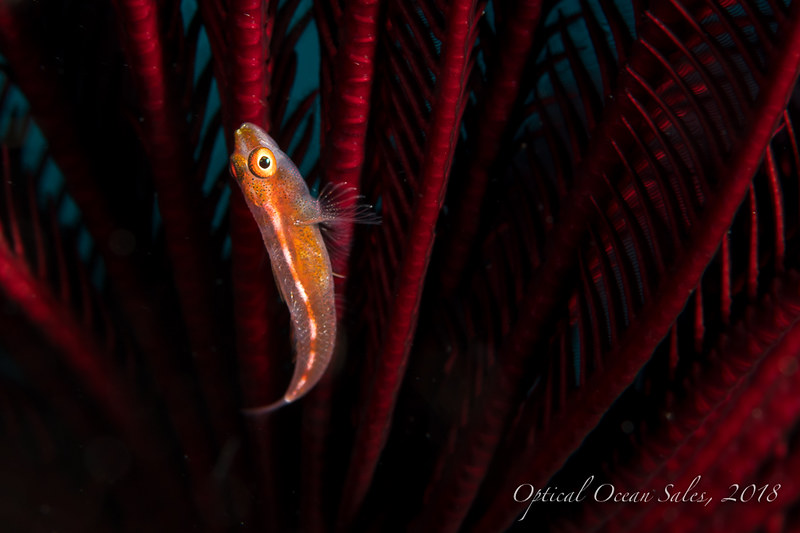
Blue Corner didn’t disappoint with lots of grey reef sharks swimming by, huge schools of jacks and a very gregarious and friendly napoleon wrasse hamming it up for photos. Siaes Tunnel (really a cavern) is deep, with the entrance at about 90’ but we were surprised by a large school of jacks hiding there and the four unique small macro fish were spotted, living nowhere else on the reefs.
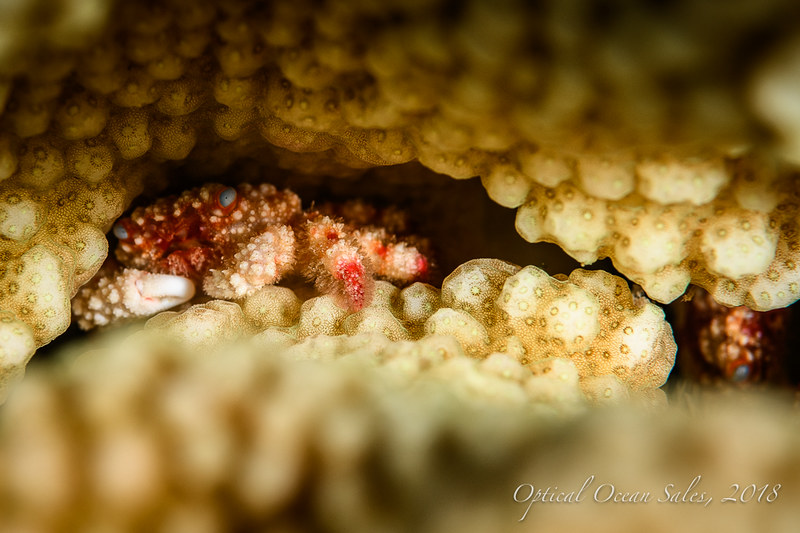
Jellyfish Lake is still closed as the jellies have died off, originally due to drought or overuse, but now nobody is quite sure of the issues there. However, we had a great dive on the Jake Seaplane with good visibility in the lagoon, and we finished the trip with an excellent macro dive right outside of Chandelier Caves with lots of unique finds like mandarinfish, two-spotted gobies and pajama cardinalfish posing for our lenses.
Once back to Korror, the crew on the Aggressor dropped us off to a very nice new rooms at The Cove Resort until our trips home started that night. On the way back, a few us stayed over in Honolulu and enjoyed a quick trip to the Pearl Harbor Memorial for the morning. All in all, the 2018 OOS South Pacific Photo Expedition was a very successful trip with lots of great dives and hundreds of photos to edit!


 The Olympus TG-5 camera and housing packages have been very popular with a wide variety of divers. The camera shoots great stills as well as 4K video. It has Olympus PT-058 housing, or the Ikelite and Nauticam housings give protection to 140', 200' and 300' respectively.
 underwater preset modes for snapshot, wide angle and other modes that make life easy. As well it has amazing macro modes that can let you shoot the small stuff with ease. All this in a rugged, camera that's drop proof, freezeproof, and water resistant to 50'. The
 To select manual flash mode, press the flash button, then select "Full", then press "Info" and turn the power down maybe to 1/20th (but not all the way) with the left/right arrow buttons. This will save your camera battery.