Tuesday, December 23, 2014

New Free Handbook: How to Photograph People Underwater

We've posted a new Handbook form our Basics of Underwater Photography series: "Photographing People" to the Resource Center. 

Full of tips and techniques from staff writer Margo Cavis on working with divers and models, it will help you add a human element to your photography.

The handbooks are visual guides full of example photos, and are a fast way to get an understanding of the basic techniques involved.

We've also published an accompanying article; How to Photograph People Underwater in our Articles section that gives more in-depth coverage.

You can download it, and the rest of our FREE Basics of Better Underwater Photography Handbooks from the Optical Ocean Sales' Resource Center.

Friday, December 12, 2014

Review: Sony A6000 Underwater Imaging, Part 2

Part 2, Diving in PNG and Using the Metabones Adapter

By Bill Van Antwerp - See part one here.

In the second part of the review for the A6000, I will discuss how the system worked underwater during a 2-week trip to Papua New Guinea on the Chertan and explore some options for lenses other than the Zeiss 50 mm macro lens.

First we will take a look at the Metabones adapter with the Canon 60 mm macro lens and the Tamron 60 mm macro lenses.  Metabones is a relatively small company based in Canada that makes sophisticated adapters so you can use Sony cameras with Canon EF and EF-S lenses. The adapters maintain electrical contact with the camera and can control both aperture and shutter speed information.  The adapters also allow autofocus but with either the Canon or Tamron 60, the autofocus speed is terribly slow. The Metabones site says “Autofocus speed is very slow and inadequate for most moving subjects. The autofocus speed is unfit for professional use for sure, and it would disappoint most enthusiasts.”  I can say with certainty that they correctly identify the issue.  To use the adapter, I put the camera in manual focus mode, set the focus for about 4 inches away and move the camera in and out slowly to reach focus then fire the trigger. 

Before the trip, I compared the Zeiss to the Canon 60 and the Tamron 60 both using the Metabones adapter. Here are some shots to compare the lenses.

Zeiss 50 macro, 1/160 second, f:22
Canon 60 macro, Metabones adapter,
f:22 1/160 second
Tamron 60, Metabones adapter,
1/160 second f:22
Looking at the three photos all appear adequately sharp, in spite of my diminishing ability to detect focus, but using the Zeiss is the simplest since it shoots autofocus.  Notice that all three lenses were shot at f:22 and show reasonable depth of field but due to the magnification that I was interested in the gills of this plastic nudibranch are still a bit out of focus.

Underwater, I was incredibly impressed with the quality of the images produced by the system.  Once the camera/housing/strobes were set up correctly the system is a joy to use underwater. 

On one of our first stops on the Chertan, we came across an anemone with Clark’s anemone fish in it.  Near the side of the anemone was a patch of eggs and with some patience I was able to capture one of the adults aerating the eggs as shown below.

This was shot with the Zeiss 50, 1/100 sec, f:11 from about 2 feet away. Color and clarity look quite nice. 

On the same dive site, we came across this little white nudi, about 12 mm or so in length. This one was shot with the Tamron 60 and the Metabones adapter.  I have probably 20 shots of this guy and this one is the one that is most in focus, using the adapter underwater with the manual focusing technique is quite hit and miss but the quality of the image when you get it is quite nice.


On many of the dives from the Chertan we were specifically looking for nudibranchs.  I often take a homemade stage with me in order to pose the nudibranchs.  This photo is one of a flabellina posing on the yellow green stage.


Doto nudibranchs are some of the most beautiful in the area and can make some spectacular photos. This photo is not terribly spectacular but shows the beauty of the Doto. This one is called the donut but has no family name only sp.

The Zeiss lens captures both the intricate detail of the Doto and the gorgeous colors.

Overall, I like the system a lot. In spite of a few issues with sync speed and manual strobe control, the system performed well and I was able to get a pretty nice portfolio from the trip.  The system using the Zeiss lens is easy to use, all of the controls are very easy to get to (except the back focus button) and it is easy to compose with the viewfinder, I never used the back screen for composition.  Battery life is exceptional; it was easy to get at least 3 dives per full battery charge, and the battery life indication is easy to see and appears to be quite accurate.  At the end of a particularly long third dive the camera told me “battery exhausted” and I thought so was the diver. 

Shooting the system with the Metabones adapter and manual focus is a very different type of photography than shooting it with autofocus lenses.  It is much more contemplative since it takes quite a while to set up and shoot, moving the camera very carefully toward the subject and figuring out focus plane.

The whole process of shooting with the Metabones system is similar to shooting large format cameras, you definitely need to slow down and really think about how this will look on the wall.

The above picture was taken with the Tamron 60 macro lens and the Metabones adapter. Controlling where the in-focus areas should be is great fun but a bit more work than simply aiming and shooting. More work, but definitely a lot of fun if you are willing to take the time on a particular subject.  One other thing that is very easy to do is to use and adapter and some older manual focus macro lenses.  I shot on a couple of dives with an ancient Asahi Macro-Takumar using a NEX – M42 adapter.  You have to pick your aperture and focus length on the boat, this is even more fun/challenging than using the Metabones which allows aperture control, but you can achieve a “look” that is completely different than the “look” of modern lenses.

This little Okenia is about 4 mm long, and this was shot with the Nauticam SMC and the Zeiss 50.  The system is quite versatile since you can shoot semi-manual with your Canon lenses if you want, or you can shoot full manual with any of a variety of older lenses.  While I did not shoot any wide-angle photos on the trip, friends who shoot the Zeiss 12 mm think it is awesome.

Overall, I think the A6000 camera in the Nauticam system is a great tool for shooting macro and super macro.  Using the Nauticam SMC and the SMC multiplier on the Zeiss 50 led to some amazing super macro photos and the quality of the SMC with the Zeiss is remarkably clear with little or no aberrations.

Saturday, November 22, 2014

Review: Sony A6000 & Nauticam NA-6000, Part 1

Diving with the Sony Alpha-6000, Part 1 – Camera and Housing
What’s a Macro Guy to Do?

By Bill Van Antwerp, President, LA Underwater Photo Society
Introduction: We just completed a 2-week trip to PNG followed by a week in Bali. Before the trip, I changed systems (again) and brought only the Sony alpha-6000 camera, the Zeiss 50 macro lens and a brand new Nauticam Housing for the camera. For strobes I brought along a couple of Inon S2000s and a couple of Sea & Sea YS-D1.

The Camera: Before we get to the diving and underwater use, lets take a look at the camera. The Alpha 6000 is quite small; here is a comparison of the A-6000 to the Olympus OM-D E-M1.  The sensor size of the Sony is much larger, it is 23.5 x 15.6 mm while the Olympus is 17.3 x 13 mm; the Sony is 24 megapixels while the Olympus is 16.
Sony Alpha 6000 vs. Olympus OM-D E-M1
Sony Alpha 6000 vs. Olympus OM-D E-M1 (top)
Since lenses need to be designed to cover a specific sensor size, the macro lenses for APS-C sensors are typically larger than those for micro 4/3 sensors.
Zeiss 50 mm macro lens vs. Olympus 60 mm macro lens
Since most of our underwater photographs are taken using strobes, it is important to understand the flash system of the camera. The A-6000 has a tiny built in strobe and it can fire only in fill flash (TTL) mode with no manual mode possible.

How well does TTL work on the camera?

Not terribly well in my opinion. These were shot with the following parameters:
Camera in manual mode, shutter speed at 1/160 second, the max sync speed, internal flash set to fill mode, center point focus and center point metering, and the camera lens approximately 1 foot from the subject. The flash is rated with a guide number of 20 feet so at a 1 foot distance f/20 should be perfectly exposed and here you can see that even f/14 is underexposed. The exposures at f/5.6 to f/11 are fine but at higher and lower exposures the camera struggles. 

This brings me to some of the things I really like about the camera and things that I think are major limitations.

Upsides:
  1. The camera is quite small, very easy to use and the menu system is much simpler than say the Olympus cameras. 
  2. The large sensor can lead to beautiful photographs when coupled with the right lenses.  Native ISO of 100 is also great, really gorgeous and very low noise shots. 
  3. The Zeiss lens is quite sharp, with beautiful bokeh and great color rendition. 
Downsides:
  1. There is no manual flash mode, only fill/TTL. This often leads (after 5 shots or so) to ridiculously long cycle time for the internal flash to fire. It also significantly eats into battery life.
  2. The camera has a maximum flash sync speed of only 1/160 second. This is far too slow for serious wide-angle shots, particularly sunballs and makes it hard to reduce ambient light and get black backgrounds.
  3. The Zeiss lens while quite nice and quite sharp is rather slow to focus and hunts a lot, and the camera will fire the shutter with nothing apparently in focus. This leads to quite a few missed shots and quite a few throw away shots with nothing in the frame in focus.
Nauticam A6000
The HousingThe Nauticam housing for the Sony A-6000 is very much like any of the micro 4/3 housings from Nauticam.  The housing is black anodized aluminum that fits the camera like a glove and the camera mounts inside the housing with a mounting plate that securely locks in place. Unlike the NA-EM1 Nauticam housing with integral handles, the A6000 housing uses on of the Nauticam tray systems with no handle stabilization. I used a Flexitray with two handles with the system. Since I set up my system to have quite a bit of flotation, I have set it up as shown below.

My System
The system is shown here the way that I dove it most frequently with 2 Inon strobes on very short arms and a focus light attached to the body. Occasionally I shot it with two Sea & Sea YS-D1 strobes, which are a bit larger and quite a bit more powerful. I always used the housing with the vacuum system installed; it is something that everyone should use for every housing. The vacuum system from Nauticam is quite nice, easy to use, and once the vacuum is pumped down it held for at least 24 hours, so I could set the camera up the night before an early dive. The port system for the housing is great, with positive locking assured if you can close the port latch.

A New Contender:
Sea & Sea Enters the Mirrorless Market

Sea & Sea has been busily redesigning and re-inventing their product MDX offerings to be more competitive. The first of these was the MDX-RX100 compact housing that was released last spring. Now they've released the first of their new mirrorless line, the MDX-A6000.
Sea & Sea has done their homework and the housing is easy to hold and use, with larger dials and labeled controls. It should be a little easier to use than the Nauticam version in some ways. Sea & Sea has used the same sort of locking lever and internal bayonet mount that Nauticam pioneered (rumor has it that it was licensed from them).
The housing is more angular with unusual mounting options directly on the housing for base-to-ball mounts, which may/may not be useful - a tray is the best idea to spread your arms and strobes. But the angular shape allows for the video button and the zoom control to be spread out so that your hand doesn't accidentally hit it while going for the the AF button or rear dial - one of Bill's chief complaints above. This results in a housing that should be much easier to use with gloves.
Other differences include the Vacuum leak detection system on the Nauticam. Sea & Sea has a leak detector as an option (and it's not cheap).
Initially Sea & Sea only has two ports as well, Nauticam has a complete selection for all the Sony lenses, but in the coming months more port and gear options will be forthcoming.
Consumers are the winner here, more selection and competition should spur better design and pricing.
How well does the housing work? The Nauticam housing works quite well with a few minor and a couple of major issues.  The camera goes in the housing with a satisfying feel, a nice click and it is seated firmly.  The two major issues I have with the housing are the placement of the AEL button, which is inboard of the record button. I am a big believer in using AEL for composition but with this housing it is a pain since I kept turning on the recording and this was in tropical waters with no gloves. At home in California in dry-gloves this will be virtually impossible.

The second complaint is that threaded port for the ball mount on the top of the housing is not keyed as it is on some other Nauticam housing which means that the focus light spins more or less freely even when the ball mount is tightened as much as possible by hand. Having to use a tool to tighten and remove a ball mount is not an elegant solution, keying the threaded hole works quite well.

I have a few minor complaints about the housing. The first is aimed at some of the materials used in construction of the system. Like with many other Nauticam products, rusting of stainless steel components is a problem. On my Flexitray, the screws holding the handles to the base are severely rusted. One other minor issue is that the handles on the system are quite flexible; unlike the more “professional” Nauticam micro 4/3 housings that have integrated handle braces, this one is quite bendy.  Finally, while there is a button to raise the camera flash after loading in the housing, about half the time it doesn’t work properly with the flash sticking on the plastic plate of the flash ports. I learned this the hard way on several dives where I had one working strobe on the left side of the housing and with no right side strobe. I changed cords, and did a lot of diagnostics underwater instead of taking pictures but eventually figured it out. If you use the system make sure that you put the camera in the housing, then raise the flash and make sure it is seated properly before closing the back.
The system as configured using dual strobes in TTL mode show almost the exact same pattern of exposure as the native system with both Inon and Sea & Sea strobes, with underexposure at the small apertures that one typically uses for macro photography. After a few dives with TTL, I switched the strobes to manual and ignoring the pre-flash was able to get quite nice exposures on most subjects.  I will take a look at the underwater performance in the second part of this review.

Conclusions on the system – Overall I think the system works quite well with a few limitations. The camera is very nice, very ergonomic and the lens is capable of stunning photographs. The housing is small, very ergonomic (with the exception of the AEL button) and I had no issues with performance of the system.  The major quibbles I have are with some of the choices that Sony has made with the camera; no manual flash mode, and a sync speed of only 1/160 second. The Zeiss lens creates beautiful images, but even with a 1200-lumen focus light was a bit slow to focus. Once focus was achieved though, the pictures I think were amazing. This is a great system for shooting macro subjects and when coupled with the Nauticam SMC, super-macro with the system can be fantastic.  Getting black backgrounds at 1/160th shutter speed can be challenging but I would recommend this for the macro heads out there.

Continued on the second part of the article.

Thursday, November 6, 2014

Tips for Underwater Photographers Thinking About Shooting Video

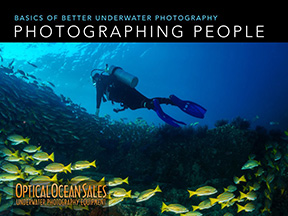
By Margo Cavis, Optical Ocean Sales
Have you ever been on a dive where you see some big animals – but you just can’t get close enough to capture a really good photo? This is the perfect chance to try out video. Some scenes that don’t make good still photos can actually make great video – like a group of dolphins off in the distance. Or, would you like to show behaviors, or tell a story? Do you want to show your non-diving friends and family how cool it really is? How about showing the world your story – online?
Video options have come a long way! Chances are, you might already have a camera that is capable of shooting video – so where does your camera fit in? Or maybe it’s time to upgrade and you’d like a camera that can shoot both photos and video?

Here are some basic camera formats and new popular models:
Basic, super compact cameras – GoPro Hero 3+ and 4 and Sony ActionCam
Compact cameras – Sony RX100 III, Canon G16 & Olympus TG-3
Mirrorless cameras – Olympus E-M1, Sony A7S or A6000, Panasonic LUMIX GH4
DSLR cameras (Crop frame) – Canon T5i & Nikon D7100 – ALSO – (Full frame – Mid-Range) – Canon 70D & Nikon D750, (Full frame Professional) - Canon 5D Mark III or 7D Mark II, Nikon D810
Consumer Camcorders (Handy Cam) – Canon Vixia HF G30 & Sony FDR AX100 with 4K video
Professional Digital Video – RED Epic Series, Sony CineAlta, Canon EOS C500- The sky is the limit!

So, if you have already been doing underwater photography, and want to venture into underwater video, or maybe you are diving straight into video… either way, here are some things to consider.


Practical Tips – the differences between Underwater Photography & Underwater Videography
Video Tunnel Vision
One of the biggest differences between taking still photos and video is the awareness that you have to have while shooting. While shooting video you have what I call tunnel vision. You have to keep your eyes focused on your view screen for much longer periods of time – while also being aware of your environment – using your peripheral vision. This is especially important when shooting video as you are moving or swimming.

Best Buddy
When shooting video I find it much easier to focus on what I am doing – if I have a dive buddy that I can rely on to keep an eye out for where I am – instead of the other way around. Because, with video, longer periods of time are focused on your camera – it makes it a little more difficult to keep an eye on your buddy. If you have a buddy that does not carry a camera – that’s even better.

Memory Hog
Video takes up much more memory than still photos! Make sure to use at least a 16G or bigger card – and – empty the card or change cards at the end of every dive day. Also carry back-up memory as well as a back-up battery.
Lighting – the same, but different
When taking video – you will need constant light from underwater video lights, as opposed to strobes. Although you will be using completely different lights, the ideal positioning is about the same for both.

Getting even better color
If you will only be editing your video with simple software programs like iMovie or Windows Movie Maker – you will not have the ability to edit your video’s color to the degree that you might be able to edit photos. So – use manual white balance if possible. More & more cameras have that option now. If you have Final Cut Pro, Premiere, After Effects or another professional editing software – you will have options for editing color, but – it’s always ideal to start with the best footage possible!

Don’t bore your audience – keep them wanting more
I know diving is exciting, but when people are watching footage later, it’s not exciting to watch the same thing on a screen for endless minutes. Yes, minutes can be way too long! Unless you are making a documentary or trip video for a group – videos should be 2-7 minutes long – with most falling in the 2 - 3 minute range, especially if you are posting them online. Keep each clip within that video around 3-10 seconds – unless there is something super exciting or captivating. Add some music to help keep things moving (but please follow copyright law).

Composition is now a moving story
So, you got the idea of how to take a good photo – now you need to look beyond that one shot – expand your intuition and predict movement. Think about how your subject is moving, then position yourself to capture it at an interesting angle. Also think about moving yourself while shooting. This will be different, try to keep camera motion as smooth as possible and again, be aware of your environment.

It’s not always best to follow your subject
Just like video on land, sometimes it’s better to let your subject enter or leave the frame – that can make a nice transition to another shot. And, you probably already know from photography – no one wants to see fish butt, that is true in video as well.

Don’t wait too long to shoot
It’s always better to have extra footage rather than too little. You want to have the before and the after – if you wait too long and just get the middle – it can make the flow of your video awkward. The same is true at the end of your take, continue filming so you have room for a transition, plus you never know what’s going to happen underwater!

Keep it crisp & clear
Before you take your camera underwater – make sure your video settings are set to PROGRESSIVE – even if you have to choose a smaller image size – choose the largest progressive setting. Interlaced settings will give you nothing but headaches when shooting underwater. Think about a group of vertical striped fish swimming by – if you shoot interlaced video – your camera only record every other horizontal line – can you picture how that might be a problem?

How many frames?
Because of the movement – the more the better! You don’t have to think about the old standards – of 24 or 30 – at least not while you are shooting. If your camera can shoot 60 frames per second or 120 (making sure it is still progressive) – go for it! More frames means more information which means clearer motion.

Before you take your camera out - set the movie file settings & keep it “Progressive.” This applies to all camera groups.

Sunday, November 2, 2014

Valencia Aquarium; Europe's Largest and Best!

I'm off driving around Spain for a couple of weeks on a non-diving vacation. You remember them...

Went to the excellent Valencia Oceanografic aquarium today and it is incredible. All of the oceans of the world represented in stellar fashion, huge tanks with multiple tunnels under them, on and on. Incredible architecture, simply world-class. All shots with an OM-D EM-1 and 9-18 and 12-50mm lenses. 
See photos


Friday, October 31, 2014

Review - Olympus PT-EP12 Underwater Housing for the PEN E-PL7 Camera

Olympus PT-10 housing alongside the new PT-12 housing.
Looking over the new Olympus PT-EP12 housing for the new PEN E-PL7 camera one is immediately struck by how much smaller it is and with a new shorter port it’s a lot more sleeker than all it’s predecessors.

Although it’s also shorter, lighter and thinner; the PT-EP12’s polycarbonate shell is still depth-rated to 147 feet (45 meters). The new housing design feels more like the compact PT-056 for the Olympus TG-3, than the older PT-EP10 for the PEN E-PL5. New are a larger, angled shutter release, easier-to-reach zoom and mode dials, and slanted function buttons - all very ergonomic to use and easier to hold. There’s a few other improvements like a larger rubber view-screen shade. Loading is still drop in and it accommodates the Olympus flash for triggering an optical sync external strobe like their new UFL-3 - a slightly revised Sea & Sea YS-01 with improved software for Olympus cameras to use RC two-way communications mode, and allows for on camera adjustments and much higher sync speeds..The internal flash and it’s housing window is too small to be used for anything else.

Features like two fiber optic sync cord plugs, cold shoe mount and a backed front and clear back are continued, as is its three-hole mounting plate. With its smaller size some smaller trays will probably fit it; so the entire rig becomes less bulky.

New easier-to-reach shutter release.
This new M.Zuiko Digital 14-42mm f3.5-5.6 MKIII EZ lens has a 3X electronic zoom capability that will be great for video, just like a camcorder you can now smoothly zoom in and out on your subject. The new lens uses their best ED glass, so it is a much sharper and higher quality lens than the kit 14-42mm MKII. The port on the EP-PT12 housing is now 67mm threaded and will work well with wet macro lenses, as there's not nearly the amount of dead air between it and the end of the port - so it will magnify the subject a little more. It’s also much, much smaller than the older port. The new MKIII EZ lens also focuses a little closer than the older MKII. But I would plan buying a couple of Zen ports to complete the system to use the Olympus 60mm macro and the 9-18mm w/a lenses. Using wet wide angle lenses with these SLRs is not recommended; you simply get too much chromatic aberration and distortion, along with very poor corners in your shots.

The smaller port is now compatible with the prime, fast mz ED 12mm f2.0, mz 17mm f1.8, mz 25mm f1.8, and mz 45mm f1.8. The 12mm and 17mm are good choices for available light underwater photography and video. But as it is flat port, and 1/3 of the field of view is lost; the 25mm and 45mm become too long and are not well-suited underwater.

The bad news also is that not only is the new port NOT compatible with the mz 14-42mm MK II kit lens that is bundled with the E-PL7, nor is it with the 60mm macro or mz 9-18 lenses - unlike all the other older PEN housings. This was always a nice feature for users; buy one housing and it would work with the same zoom gear and port that you got with the housing with other lenses.

Currently there is no bundle with the E-PL7 and the newer MK III PZ lens, so the cost to buy both is higher - $599 for the E-PL7 body only and $249 (list is $349 but it’s on sale for $100 off, when you buy a PEN or OMD body). So now $850 for the camera and lens as opposed to the $700 price bundled with the kit lens. However, there's isn't a zoom gear available because of the power zoom feature, so that saves $45. My advice? Buy the E-PL7 with the 9-18 W/A or 60 macro lens and skip the 14-42 MKIII lens.

I know that users may not quite get what Olympus was thinking, but the old port was pretty clunky in design and the new housing is much better suited to the small E-PL5 camera. The problem is that Olympus still views the ports on the EP-series, including the new PT-EP12 as non-interchangeable, even though it is obviously an easy change; remove the keeper screw, twist the bayonet mount port half and turn and pull out.

Zen has made replacement ports for some time now and their PEN series also fit this housing; but they are relatively expensive at around $500 each for the WA-100-EP dome and 45mm flat port (FP-100-EP)+ 25mm extension (ER-EP-25) for the 60mm macro, which sort of defeats the idea of a less expensive mirrorless setup than the OM-D EM1.

However, all-in-all its a nice improvement and hopefully some less expensive port options will be coming along.

Tuesday, October 14, 2014

Free Olympus E-M1 V.2 Firmware Update - Try Out Some New Creative Underwater Techniques!

While at first glance Olympus's new free OM-D E-M1 camera firmware upgrade v2 doesn't appear to offer much for underwater photography, digging into some of it's subtleties and improvements shows that it offers some pretty interesting ideas to expand your underwater universe.

The features added include most all of the latest ones now found on the new PEN E-PL7. It's not often that you can apply these types of upgrades to a camera that's nearly a year old.

Besides some improvements such as speeding up it's EVF display, more and smaller AF points, and improved focus peaking, there are a lot of new in-camera creative possibilities available such as using Keystone Correction to straighten the lines of a wreck, or maybe stalks of kelp, while shooting with a fisheye lens - right on the camera back. Same with it's Live Composite Tool; allowing for multiple exposures to be made creatively without post-processing. Other cool effects like Partial Color are now available, allowing you to shoot a brightly colored subject against a black and white background.

Do you like HDR? This popular technique of shooting and overlaying multiple varying exposures (now with exposure compensation) can be set-up and shot right on the camera. Using a high-frame rate, these HDR composites can be previewed on the camera display and then saved into RAW for further manipulation later.

Updates have also been made to the wireless apps and tethering software, along with many other features you'll enjoy using above water. You can also use them to apply filters and create composite "stories"  and upload them with your phone; without even opening your housing!

If you have one of these great Olympus micro-four thirds cameras, getting this free E-M1 firmware update is a no-brainer. It is easily downloaded onto a computer, then uploaded to the camera with the mini-usb cable included with the camera.

So enjoy this cool new present from Olympus and think creatively underwater, you might be surprised!


More information on the OM-D EM1 can be found here. You can download the updater here.

Here's a complete list of new features and changes:

8 New Functions:
  • Keystone Compensation (Digital Shift)
  • Tethered Shooting System (OLYMPUS capture)
  • Live Composite
  • Zoom In/Out and Layout have been added to Photo Story. Save (complete partway through), Temporary Save, and Resume functions have been added to Photo Story mode
  • New Art Filters: Vintage and Partial color
  • Old Film Effect in video recording
  • The Aperture Lock function has been added to Aperture Preview
  • The Panning Shot shooting mode has been added to SCN mode
16 Operability Improvements:
  • Image display time lag in the Electronic Viewfiner has been improved to 16 msec (frame rate setting is high speed)
  • Multiple simultaneous settings now available in Live Guide
  • Exposure compensation (±3 EV) is now available in HDR 1/HDR2 shooting
  • A function has been added to cancel Color Creator and return to the original Picture Mode by pressing the MENU button when using Color Creator function.
  • Movie Tele-converter can now be used simultaneously when Art Filter is set to Picture Mode.
  • AF function for each frame was added to Custom Self Timer. In Drive Mode's Custom Self Timer settings, you can now press the INFO button to change settings.
  • MF Assist is now supported in magnified frame position.
  • 3x has been added to high resolution magnified Live View.
  • The Peaking display frame rate has been improved.
  • Electronic zoom speed setting function was added. An icon appears on the LCD monitor when using an Olympus electronic zoom lens.
  • When the arrow pad is set to Direct function, the Underwater/Underwater macro functions can be used with the left and down button on the arrow pad.
  • Double tap is now supported in touch operations on the Super Control Panel.
  • The level gauge and histogram can now be displayed during magnified frame display. The Touch Off icon was added to magnified frame display.
  • A function was added so that shooting information recorded in HDR1/HDR2 can be viewed in the playback screen.
  • Information on composited number of shots for images recorded with Live Composite was added (Can be checked in Olympus Viewer3).
  • When the BKT button is held down, the BKT menu now appears.

Wednesday, October 1, 2014

New Nauticam NA-5DMKIII Housing DEEP version - rated to 500!

The current Nauticam product line is designed to function flawlessly at depths up to 100m.  This supports the majority of recreational and technical divers, but cutting edge exploration teams are pushing further. NA-5DMKIII Deep, with its 150m depth rating, will fast become the tool of choice for documenting these expeditions.

The NA-5DMKIII Deep is designed to go way beyond conventional depths. This housing is rated to 150m (500ft), 50% deeper than the standard housing. The pressure at this depth is an astonishing 16 times the pressure we feel at sea level. Nauticam engineers have increased the wall thickness of the housing to make it more rigid, and to reduce the kind of torsion that cause controls to bind or fail. Each control has been carefully upgraded in terms of strength to function under the increased pressure, and the two command dials got special attention with a proprietary process to maintain ease of operation at depth.

This housing is functionally the same as it's sibling, the NA-5DMKIII. It is slightly heavier due to the additional thickness of the housing walls, but the difference is barely noticeable. It features the same magical ergonomics that have made the Nauticam 5D Mark III housing one of the most popular housings among professional underwater image makers. 

For those few that want to go there, the NA-5DMKIII Deep stands ready to go deep. Very deep.

Here's a video of a test dive to 500' with the new housing.

NA-5DMKIII DEEP Test Dive to 500ft from Christopher Parsons on Vimeo.

Thursday, September 25, 2014

Underwater Shooters Looking Forward to New Sony a7 FE Mount Wide Angle and Macro Lenses

Sea LionUnderwater photographers who travel and want a pro-level camera have been stuck with much larger, heavier full-frame DSLR camera systems. The choice was to compromise quality and capability for smaller size mirrorless cameras, or just deal with the extra weight, bulk and travel expense. In these days of add-on airline fees, this situation has been getting worse.

Earlier this year Sony changed all that with the release of the Sony a7 full-frame mirrorless camera. This is truely a game changing platform.

As I stated earlier in my review of this camera, the Sony a7 series are light, fast, incredibly customizable, and with a great sensor. The release of the high resolution a7r and the 4k capable a7s further reinforced this great lineup.

But they have very few lenses available for the their new FE lens mount. For some reason Sony seems to come out with a new mount every time they come out with an SLR. Alpha lenses don't fit. Of course they have adapters, but those are usually slow and the resulting lens stack won't fit underwater housings. And the price adds up.

The missing lenses for underwater photography are (surprise) macro and extreme wide angle. 

Sony has recently posted the 2015 roadmap of new lenses for their FE mount that fits the a7 series. 

The good news on this front is that starting mid-next year Sony/Zeiss will ship a 90mm macro lens (still not as powerful as I'd like to see for FX) and a 28mm wide angle with FE and W/A adapters - not a great solution, but a better option than the 35mm they have now. The venerable Nikonos 15mmFE manual lens probably still remains the underwater wide angle lens of choice for the Nauticam NA-7 housing. Hopefully Sigma and some others will jump into this FE mount vacuum soon.

Here's a quote from a Sony executive from dpreview
"...There are 13 lenses for the E mount currently but we still need to create more lenses to compete with other manufacturers. We’re catching up. One consistent request from our customers is macro lenses and wide-aperture lenses...."

The promise of a lighter, smaller, electronic full-frame SLR camera system is slowly being realized. In the meanwhile, I'll still be shooting my Nikon, with decades of glass available. 

Sony a7 Lenses

Tuesday, September 23, 2014

Nautipus? Olympicam? Join Us for Experts Day Nov. 15th!

November 15th, 2014 - 9am-5pm  
Olympus Imaging/NauticamUSA Experts Day! 
 
Optical Ocean Sales is proud to sponsor an exciting opportunity for you to see the latest products from these leading underwater photo/video imaging and travel companies. Timed right before this year’s DEMA Show, they promise to show off some of their latest developments.

Featuring Representatives:
Chris Parsons, NauticamUSA - Keldan - Fisheye Fix - Zen
Steve Ball, Olympus Imaging America
Donna Lattin, owner, South Pacific Island Travel
 
It’s your chance to come in and get your questions answered about using these great products, learn tips and tricks from Olympus and Nauticam, as well as get help and advice from the friendly Optical Ocean Sales staff. We will also have some staff presentations on underwater photography.

 Donna Lattin from South Pacific Island Travel will be available to answer questions about our upcoming Photo Expedition to the Red Sea and other exotic destinations. There will be food, give-aways, deals and lots of fun and excitement to enjoy!

Optical Ocean Sales, LLC
1800 Westlake Ave. N., Suite 201
Seattle, WA 98109
800-359-1295

Saturday, September 13, 2014

Check Out the FREE PNW Diver Magazine!

Pacific Northwest Diver | September, 2014
Download it free here

Photographers/Videographers: 
Richard Salas, Author & UW Photography Instructor: Santa Barbara, CA
Lisa Zazzi, Point & Shoot Photographer: Vancouver, BC
Bob Bailey, DSLR Photographer and Octo Architect: Federal Way, WA

Technical Corner- 
Optical Ocean Resource Center: Pamphlets: Starting Concepts, UW Lighting, Wide Angle, Composition, Maintenance Comparison Charts: Strobes and Lights

News Corner: Puget Sound Eelgrass

Operator: Salmon Safari, Campbell River, BC

Saturday, September 6, 2014

Check Out Our New E-Mailer!

Our new E-Mailer is out with lots of great info on our Resource Center, Raja Ampat Trip, New Systems and lots of great deals!

Check it out here!
Subscribe here so you don't miss the next issue!

Reefs in Texas - Yee Ha!

Trip Report - Flower Garden Banks National Marine Sanctuary - July 2014 - By David Todd

Recently I had a chance to dive on some of the healthiest coral reefs in the world off the coast of Galveston, Texas in the Gulf of Mexico.

The Gulf is not known for it’s pristine waters. With two-thirds of the US draining into it, it tends to be muddy, filled with oil and gas platforms and wouldn’t be most people’s first choice when searching for a dive destination.

Those folks are missing out.

The Flower Garden Banks National Marine Sanctuary, one of thirteen Marine Sanctuaries administered by NOAA, contains 350 acres of some of the healthiest coral reefs in the world, with up to 55% live coral coverage. To put this in perspective, the coral coverage in the Caribbean averages in the teen percentages.

The reefs at Flower Garden and Stetson Banks are the Northern-most tropical reefs in the continental US and are part of the US’s National Marine Sanctuary system. The nearest tropical reefs are 400 miles south in Mexico.

Since they range from 80 to 110 miles offshore, they don’t get a lot of traffic from divers, in fact there is only one regularly scheduled live-aboard that services the area. Leaving from Freeport, Texas, about an hour from Galveston, The MV Fling holds and up to thirty divers and does two and three day trips to introduce folks to the “Texas Caribbean.”

You board at night and the vessel steams through the night to get out to these gorgeous reefs.
This trip is not for the faint of heart. It is somewhat advanced diving, both because of the depth of the reefs, average 65-75 feet for the top of the reefs and the variable strong currents that can occur at the bottom, mid water and at the surface.

Water entrances and exits are somewhat athletic, with a 6-foot giant stride entry and a trailing line exit to the ladder that can feel like a bit of a Nantucket Sleigh Ride when the surface currents are up. Also the dive masters on this boat are very thorough in their safety and site briefing, but they do not accompany you on your dives. You will want to be comfortable in your abilities to dive there.

Winter is the time for schooling Hammerheads and occasional Tiger sharks, but during our summer visit we were treated to Mantas and a school of 7 30+-foot Whale Sharks. Great Barracudas and large jacks accompanied us on every dive, sometimes in schools of over 100 fish.

In general, the Flower Garden Banks reefs are large colonies of coral of 25 different species, populated with large snapper, masses of Creolefish and grunts and an occasional Spotted Drum and other exotics as well as a host of gulf invertebrates from huge sponges to slate pencil urchins.

Stetson’s rocky terrain is often described as a moonscape; It’s upswept rocky ridges are home to large schools of Vermillion Snapper, Queen Conchs, the rare Golden version of the Spotted Trunkfish and a resident Sandbar shark, that we were lucky enough to watch in hunting mode.

Night dives at Stetson were equally as fascinating as the day, with all of the nocturnal animals like Beaded Sea Cucumbers, sea urchins, Slipper Lobsters and decorator crabs foraging over the reef while the day fish slept. We had to take care to not spotlight the sleeping fish in order to keep them safe from the hungry jacks that opportunistically use divers lights as a hunting tool.

In addition to the Flower Garden Banks and Stetson Banks, most trips also dive on an oil platform or two. This is truly a spectacular experience, as these massive steel structures form artificial reefs and are teaming with life, from tiny macro critters like blennies and gobies, bizarre alien fish like the large scrawled filefish and cowfish to schools of large pelagics like jacks and sharks. In fact, we had a great several minute visit from a curious Silky Shark while hanging on our safety stop at Platform High Island 389 which is known as one of the top ten oil platform dives in the world.

Needless to say, there were amazing opportunities for photography and videography on this trip. From big animals to macro it was there. However, I was there on a biological survey trip with a group of marine educators and photography took back seat to our surveying activities.

I was able to shoot a bit of video in which you can get a glimpse of some of the life there.

 
Flower Garden Banks National Marine Sanctuary - Sony RX 100-II 60p Underwater Video
from Optical Ocean Sales on Vimeo.

I am looking forward to getting back to the Gardens for a winter trip and I will definitely take my camera on every dive next time!

Equipment Used:
  • Sony Rx100 - II
  • Sea and Sea MDX RX100 Housing
  • Fisheye Fix 2k Video Light
  • I-Das arms and Tray
Links:
Flower Garden Banks National Marine Sanctuary
Fling Charters

Wednesday, September 3, 2014

Sea of Cortez Sony a7 Underwater Video

We have a new video posted on Vimeo. Some various clips of whale sharks, bull sharks, wrecks, huge schools of fish and lots of fun from our June Photo Expedition on the Solmar V. Shot on the Sony a7 in a Nauticam USA housing with an old manual focus Nikonos 15mm FE lens. Viz was pretty challenging most of the time...and yeah, I mostly like to shoot stills...but this video thing is fun!

Sea of Cortez from Optical Ocean Sales on Vimeo.

Wednesday, August 20, 2014

A Beginner’s Dilemma – Canon SL1 vs. Sony RX 100

by Bill Van Antwerp, President LACUPS
A couple of weeks ago someone suggested that the Sony RX100 generated far nicer photos than the Canon SL1. Having shot both of them on land, I was not convinced. However underwater it might be a different story. So thanks to Andy Sallmon our local Sea and Sea representative, I got the chance to take both diving near Catalina Island. The Canon SL1 is a digital SLR and the Sony RX100-II is a point and shoot with a similarly-sized sensor.

A comparison of the two cameras is shown below:

Sony RX100-II Canon SL1
Sensor 5472 x 3648 (20 MP) 5184 x 3456 (18 MP)
Format Still JPEG, Raw JPEG, Raw
Movie MP4, MPEG, H.264 MOV, MPEG-4, H.264
Memory Card SD, Sony Memory Stick Duo SD
Image Stabilization Optical Lens Dependent
Dimensions 4.0 x 2.3 x 1.5 4.6 x 3.6 x 2.7
Weight 281 g 370 grams
Lens (as shot) Zeiss 28-100 (35 mm equivalent) Canon 60 macro
Sync speed 1/1000 1/250
Shutter Lag 372 ms (with flash) 102 ms (with flash)
Viewfinder Electronic Optical
Smallest Picture Size 76 x 51 mm 23 x 15 mm
Price $648.99 $649 (with 18-55)

The Canon SL-1 was set up with the Canon 60 mm macro lens and the RX100II of course had only its beautiful Zeiss lens with no wet diopters. I know this is an unfair comparison of the two systems, but that is what I had and that is what I shot.

Sea & Sea housings were used for both; the MDX-RX100/II and the RDX-100D. These were paired with twin Sea & Sea YS-D1 strobes, shot in TTL mode with RAW photo capture mode.

Now, I am a dedicated macro guy, I love to shoot little stuff, particularly nudibranchs, but on this day at least, there were no nudis to be found on the front side of Catalina. There were however a bunch of garibaldi around including some juveniles and for little stuff comparison, there were a bunch of blue-banded gobies. 

For comparison purposes all files were opened in Lightroom (5.6) with the punch preset of Clarity +30 and Vibrance of +25.

The first photo is a close up of a garibaldi from the SL1.

Photo 1: Garabaldi from Canon SL1

Figure 2 is a garibaldi from the RX100. The conditions were not quite as nice but you can see that the color balance from the RX 100 is quite good.

Photo 2 from Sony RX-100II
Figure 3 is a ubiquitous blue banded goby shot with the Canon
Photo 3 from Canon SL1
Figure 4 is the same blue banded goby with the Sony. 
Photo 4 from Sony RX-100II
Figure 4 shows a lot of green algae next to the goby; this is not a flaw of the camera but rather is the color of the reef where this was shot. The differences in the magnification are significant but that is more due to the fact that I used the Canon with the 60 macro lens.

Figure 5 is a juvenile garibaldi with the SL1
Photo 5 from Canon SL1
and figure 6 is a slightly older garibaldi shot with the RX-100II.
Photo 6 from Sony RX-100II
In the RX-100 shot, the green tint can not be easily removed and still keep the garibaldi, more or less perfectly exposed.

I also got to shoot the RX-100 in the Sea and Sea housing with the D1 strobe at an indoor pool function with beginning discover students.
Sony RX-100II
Sony RX-100II
Sony RX-100II
Conclusions: If you are starting out underwater and are looking for a first system, either of these cameras will help you get great underwater shots. The Sony is a great little camera, but occasionally in our quite green Southern California waters there was a little color-cast that was impossible to remove. Shooting the same types of scenes with the Canon (and the exact same strobes), led to more neutral colors.

The advantages of the Sony are it's small size and the ability to shoot both wide and macro on the same dive, if you have the appropriate add-on lenses.

The advantages of the Canon are that you can shoot much smaller subjects without an add-on lens in a really small, compact package.

For me as a macro/super macro photographer, the Canon is by far the preferable package. You can of course add on a wet diopter to the Sony, or even stack them, but the starting point for magnification is about 11 times less area.

At the end of the day, both cameras performed very well underwater, both housings were a joy to use, and both cameras took very nice pictures; you won’t go wrong with either choice.

Tuesday, August 19, 2014

Join Us for Humpbacks, Sharks, Mantas & More!

March 10-18th, 2015; Socorros Photo Expedition on the NEW Nautilus Belle Amie!

The Revillagigedos Islands, also known as the Socorro Islands, are located 250 miles offshore southwest of Cabo San Lucas, Mexico. They form an oasis for pelagic life amongst their volcanic shores. Many hammerhead and silky sharks, giant manta rays, dolphins, sailfish, schools of jacks and tuna come to feed, mate and get cleaned by small endemic Clarion Angelfish.
These animals tend to be quite friendly towards divers at times, allowing for fantastic interactions and blue water photo opportunities.

Giant Mantas: The giant Pacific mantas which you will meet at Socorro are the largest of the rays and we believe they are the most majestic creatures in the ocean. They swim by moving their wing-like pectoral fins, which can grow up to 7 meters wide, but usually average about 5 – 6 meters. What is even more extraordinary is that the local population of bottlenose dolphins have learned to mimic the behaviour of the giant mantas. It is very likely that these wild dolphins will also move in close and intimate to divers during your trip.

Shark sightings are also very good at Socorro Island with common sightings of silky, galapagos, hammerhead, white tip and silver tip sharks.

Humpback Whales: Optical Ocean Sales has organized this trip to go at a perfect time of year to see migrating Humpback Whales. A population of 1200 humpbacks moves into the island’s waters in early spring and chances are excellent that you will have encounters with these mighty giants. You may even hear them singing through the hull of the ship at night as you lie in your bunk.

Optical Ocean Sales: Owner Jack Connick (making his 4th trip to the islands), will help you get the most of your underwater photo opportunities.

New Nautilus Belle Amie Liveaboard: At 140' in length and 300 tons, the Nautilus Belle Amie redefines luxurious diving. Staterooms are located on three decks and are very spacious with en-suite heads and twin beds and no bunk beds! Three high-speed rigid inflatable 28' dive skiffs are loaded on/off the stern, you just step on and off, your gear is ready! A hot tub and bar complete the upper deck, with a comfortable saloon and dinning room and another bar on the wheelhouse deck.

The ship is stabilized, fast and comfortable in a seaway. In fact, it's the only boat to offer 6 full days of diving on a week's trip! Departs beautiful Cabo San Lucas, Mexico.

Spots on this trip start at only $3355. Read more and sign up in the store Download our flyer!

Translate