Got a new underwater camera? Photos not quite up to snuff? Here are 5 quick tips to help you out.
Tip #1. Get close, have a conversation. If you think you are close, get closer. Two to four feet away is where most digicams shine. Many have a macro setting that can focus the lens from 1" to 4'. That’s the setting to use most of the time, as it is the perfect range for your strobe and for best sharpness. Remember that the more water you have between the camera and the subject, the less sharp and vivid your shots. But be careful in getting too close, there is a point where cameras cannot focus, check your manual.
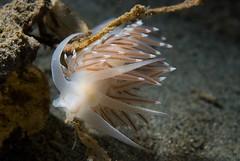
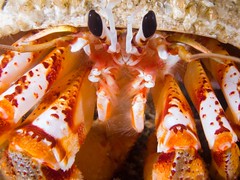
Try to capture the head and eyes of your critters. Have a conversation with them, just like when you meet someone and shake hands.
Tip #2. Shoot up. Use the available light to help light your backgrounds for "reefscapes".

Tip #3. You can't light everything. In combination with Rule #1 & 2, try a type of shot called a close-focus, wide-angle.
Get close to say one fish, a nice outcropping of coral, or an anemone. Light that with your strobe. Point at an upwards angle, setting your camera on auto, or meter the water column and select a slower shutter speed (not any lower than 1/60th) to let the available light open up the background. Center the subject and take a half squeeze on the trigger to focus. With your finger still holding the half-press, re-compose with the subject close and to the side, maybe lower in the frame. Hold your camera steady and squeeze the trigger the rest of the way. Now you have a nice shot of a subject and it's environment giving greater depth and drama.
Tip #4. Macro. To get a nice black background, use your strobe in TTL, or auto, and increase your shutter speed. Set it as fast as possible, with a low ISO for sharpness and the strobe as close as possible to the subject for the best color saturation. You may have to turn the power down and use a diffuser to soften the light.
The background is always controlled with shutter speed. Want to open it up? Shoot slower. Want it blacker? Shoot faster. Can't get what you want? Adjust strobe power or position so you can work with it. Close in is where TTL usually shines. If you’re shooting in mid-water, you'll do better with manual strobe settings.
 Tip #5. In-between. What about fish portraits and buddy shots? Set your camera to manual, or on program mode. Set an aperture somewhere in the middle (maybe f4) and shutter speed to as slow as you can hold, usually about 1/60th. Increase the strobe power or use TTL/auto.
Set the ISO as slow as possible. Remember, higher ISO means more noise, seen as fuzziness. Set it at ISO 100, or lower, for macro. For other shots, try to not go above 200 to 400.
On digicams where you don't need the depth of field, the middle aperture setting (f4) gives the best sharpness. This is due to the very small actual apertures on these lenses and the way light waves pass through them.
Tip #6. Break the rules! Hey, you said 5 tips. Well, the sixth is simply to break the rules. Try things out. Experiment. Many times the best shots come from bending, breaking, and creating your own rules. Look at your mistakes carefully, learn from them and try another variation.
Have fun with underwater photography, the more you shoot, the better your shots will get!
--------------
Jack Connick is a Seattle diver and graphic designer who always wanted to be a photographer. He writes a blog, Optical Ocean on diving, sailing and underwater photography, and has traveled extensively around the world, logging around 700 dives in ten countries.
His company Optical Ocean Sales.com, is an authorized dealer for Fantasea Line and other underwater photography products.
Visit and join his free Cold Water Diving Flickr photo group.