Wednesday, August 20, 2014

A Beginner’s Dilemma – Canon SL1 vs. Sony RX 100

by Bill Van Antwerp, President LACUPS
A couple of weeks ago someone suggested that the Sony RX100 generated far nicer photos than the Canon SL1. Having shot both of them on land, I was not convinced. However underwater it might be a different story. So thanks to Andy Sallmon our local Sea and Sea representative, I got the chance to take both diving near Catalina Island. The Canon SL1 is a digital SLR and the Sony RX100-II is a point and shoot with a similarly-sized sensor.

A comparison of the two cameras is shown below:

Sony RX100-II Canon SL1
Sensor 5472 x 3648 (20 MP) 5184 x 3456 (18 MP)
Format Still JPEG, Raw JPEG, Raw
Movie MP4, MPEG, H.264 MOV, MPEG-4, H.264
Memory Card SD, Sony Memory Stick Duo SD
Image Stabilization Optical Lens Dependent
Dimensions 4.0 x 2.3 x 1.5 4.6 x 3.6 x 2.7
Weight 281 g 370 grams
Lens (as shot) Zeiss 28-100 (35 mm equivalent) Canon 60 macro
Sync speed 1/1000 1/250
Shutter Lag 372 ms (with flash) 102 ms (with flash)
Viewfinder Electronic Optical
Smallest Picture Size 76 x 51 mm 23 x 15 mm
Price $648.99 $649 (with 18-55)

The Canon SL-1 was set up with the Canon 60 mm macro lens and the RX100II of course had only its beautiful Zeiss lens with no wet diopters. I know this is an unfair comparison of the two systems, but that is what I had and that is what I shot.

Sea & Sea housings were used for both; the MDX-RX100/II and the RDX-100D. These were paired with twin Sea & Sea YS-D1 strobes, shot in TTL mode with RAW photo capture mode.

Now, I am a dedicated macro guy, I love to shoot little stuff, particularly nudibranchs, but on this day at least, there were no nudis to be found on the front side of Catalina. There were however a bunch of garibaldi around including some juveniles and for little stuff comparison, there were a bunch of blue-banded gobies. 

For comparison purposes all files were opened in Lightroom (5.6) with the punch preset of Clarity +30 and Vibrance of +25.

The first photo is a close up of a garibaldi from the SL1.

Photo 1: Garabaldi from Canon SL1

Figure 2 is a garibaldi from the RX100. The conditions were not quite as nice but you can see that the color balance from the RX 100 is quite good.

Photo 2 from Sony RX-100II
Figure 3 is a ubiquitous blue banded goby shot with the Canon
Photo 3 from Canon SL1
Figure 4 is the same blue banded goby with the Sony. 
Photo 4 from Sony RX-100II
Figure 4 shows a lot of green algae next to the goby; this is not a flaw of the camera but rather is the color of the reef where this was shot. The differences in the magnification are significant but that is more due to the fact that I used the Canon with the 60 macro lens.

Figure 5 is a juvenile garibaldi with the SL1
Photo 5 from Canon SL1
and figure 6 is a slightly older garibaldi shot with the RX-100II.
Photo 6 from Sony RX-100II
In the RX-100 shot, the green tint can not be easily removed and still keep the garibaldi, more or less perfectly exposed.

I also got to shoot the RX-100 in the Sea and Sea housing with the D1 strobe at an indoor pool function with beginning discover students.
Sony RX-100II
Sony RX-100II
Sony RX-100II
Conclusions: If you are starting out underwater and are looking for a first system, either of these cameras will help you get great underwater shots. The Sony is a great little camera, but occasionally in our quite green Southern California waters there was a little color-cast that was impossible to remove. Shooting the same types of scenes with the Canon (and the exact same strobes), led to more neutral colors.

The advantages of the Sony are it's small size and the ability to shoot both wide and macro on the same dive, if you have the appropriate add-on lenses.

The advantages of the Canon are that you can shoot much smaller subjects without an add-on lens in a really small, compact package.

For me as a macro/super macro photographer, the Canon is by far the preferable package. You can of course add on a wet diopter to the Sony, or even stack them, but the starting point for magnification is about 11 times less area.

At the end of the day, both cameras performed very well underwater, both housings were a joy to use, and both cameras took very nice pictures; you won’t go wrong with either choice.

Tuesday, August 19, 2014

Join Us for Humpbacks, Sharks, Mantas & More!

March 10-18th, 2015; Socorros Photo Expedition on the NEW Nautilus Belle Amie!

The Revillagigedos Islands, also known as the Socorro Islands, are located 250 miles offshore southwest of Cabo San Lucas, Mexico. They form an oasis for pelagic life amongst their volcanic shores. Many hammerhead and silky sharks, giant manta rays, dolphins, sailfish, schools of jacks and tuna come to feed, mate and get cleaned by small endemic Clarion Angelfish.
These animals tend to be quite friendly towards divers at times, allowing for fantastic interactions and blue water photo opportunities.

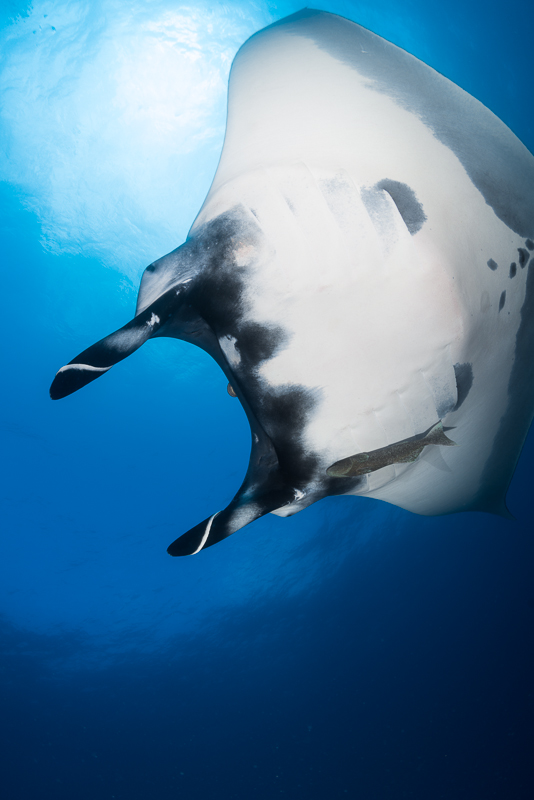
Giant Mantas: The giant Pacific mantas which you will meet at Socorro are the largest of the rays and we believe they are the most majestic creatures in the ocean. They swim by moving their wing-like pectoral fins, which can grow up to 7 meters wide, but usually average about 5 – 6 meters. What is even more extraordinary is that the local population of bottlenose dolphins have learned to mimic the behaviour of the giant mantas. It is very likely that these wild dolphins will also move in close and intimate to divers during your trip.

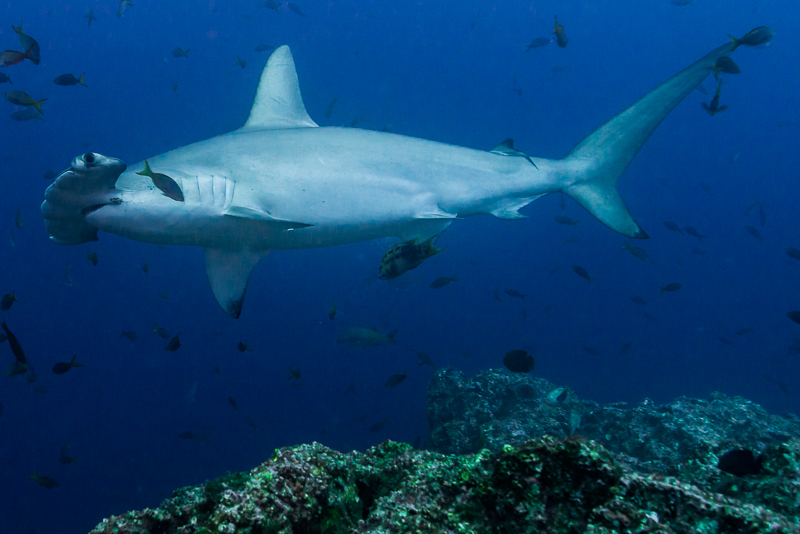
Shark sightings are also very good at Socorro Island with common sightings of silky, galapagos, hammerhead, white tip and silver tip sharks.

Humpback Whales: Optical Ocean Sales has organized this trip to go at a perfect time of year to see migrating Humpback Whales. A population of 1200 humpbacks moves into the island’s waters in early spring and chances are excellent that you will have encounters with these mighty giants. You may even hear them singing through the hull of the ship at night as you lie in your bunk.

Optical Ocean Sales: Owner Jack Connick (making his 4th trip to the islands), will help you get the most of your underwater photo opportunities.

New Nautilus Belle Amie Liveaboard: At 140' in length and 300 tons, the Nautilus Belle Amie redefines luxurious diving. Staterooms are located on three decks and are very spacious with en-suite heads and twin beds and no bunk beds! Three high-speed rigid inflatable 28' dive skiffs are loaded on/off the stern, you just step on and off, your gear is ready! A hot tub and bar complete the upper deck, with a comfortable saloon and dinning room and another bar on the wheelhouse deck.

The ship is stabilized, fast and comfortable in a seaway. In fact, it's the only boat to offer 6 full days of diving on a week's trip! Departs beautiful Cabo San Lucas, Mexico.

Spots on this trip start at only $3355. Read more and sign up in the store Download our flyer!

Saturday, August 9, 2014

Setting up a Panasonic GH4 for Diving

To a lot of you who’ve been shooting video with DSLRs for some time, the settings on the GH4 might be a bit “ho hum”. But, for me, shooting camcorders for the last 10 years, it’s been a sea-change. I spent a lot of time studying the settings and came up with something that works for me. I thought that I’d share it.

Firstly, I have to say that I prefer a “natural” look; I like my finished video to look as close as possible to what my eyes saw underwater. So that "natural look" bias is in my settings. I don't WB to white or add a lot of red. You can adjust to your own tastes.

Secondly, when I am underwater, I want to focus as much of my attention on the “story” and the “subjects”. But I rarely use an “auto-everything” approach as that does not work well in many situations. But, I do like to quickly get to as close to the "optimal look" without too much fiddling and adjustments (while the whale shark swims away).

So, I have found it very useful to leverage the custom setting feature in the GH4. It works really well with this camera.

After a lot of research and testing, once I had an idea of what I needed, here is the process that I used:
1. Set all the “in menu” settings (my preferred settings are below)
2. Set the camera controls to your most “usual” setting
3. Set the WB presets (more on how to do this below)
4. Save this to C1 (in my case, C1 is full manual)
5. Without changing the menu settings from C1, change the camera settings to your second most “usual” settings
6. Save this to C2 (in my case, C1 is shutter of 1/50 with AFL/AEL for focus and exposure)
7. Change to your third most “usual” settings.
8. Save this to C3-1 (in my case I use “shutter 1/50; auto-everything-else”)
9. (you could do two more settings, C3-2 and C3-3, but I don’t use these because they are not so quick to access)
more...

Wednesday, August 6, 2014

Mirrorless in Mexico: Nauticam NA-A7 - Sony a7 Review

On our recent shop trip to The Sea of Cortez, I left behind my trusty, but large, D800 Nauticam rig and decided to try a new mirrorless camera: The Sony a7 full-frame camera in a NA-A7 Nauticam housing.

It was much smaller to pack and handle and the results were better than I hoped for. The Sony a7 with an old Nikonos 15mm FE amphibious film lens shot remarkably well, sharp and was quite small to handle compared with large domes normally used for a full-frame rig.

The Sony a7 (and a7r, a7s) are very impressive; the first full-frame camera in a mirrorless body! With it being much smaller and lighter than the D800, it was easy to carry around. Performance was very good, the camera is very comfortable and solid to shoot.

The controls to change ISO as well as other features are right under your fingertips on the Nauticam housing. One big advantage of the Sony over the Nikon is that you can program several function buttons and use them on the housing to bring up other screens providing convenient access to various functions that otherwise are buried down in the menus.

Besides the Nikonos 15mm FE, I shot  the a7 with the kit Sony 28-70mm lens behind the Nauticam flat port. This lens works pretty well as a moderate mid-range lens, fairly sharp for it’s modest cost, with good imaging characteristics. In low light at deeper depths, I was still able to catch focus and it shot fish portrait type shots quite well.

The legendary Nikonos 15mm FE film lens, mounted in an adapter, lived up to it’s reputation. It delivered stunning wide angle, even though it has manual aperture and focus controls. external Nauticam 180 viewfinder to good result with a wide range of displays offered in both. A nice feature of the electronic viewfinder was that you could turn the image lighter or darker, something you can’t do with the optical viewfinder of the D800.
By setting it to f/9-f/11, I had a large depth of field for focus and only changed it when changing from long distance to close focus wide angle. It was also easy to use Sony’s focus peaking feature to “fire when you see the red of their eyes” and know you had the shot nailed. I used both the large, sharp rear view screen and the electronic viewfinder with an

One area where the Sony a7 was a standout is shooting at high ISOs in dark environments. I shot the very dimly lit holds inside of the Fang Ming wreck at ISO 3200 and got good results, even with the older Nikonos 15mm lens. Not much noticeable grain, and I’d say it was better at that high ISO than my D800 was at ISO 2000. Dynamic range was pretty good, comparable to the Nikon.

I shot it with two electronically synced Sea & Sea YS-D1 strobes in manual. TTL is not currently available, although Nauticam has come out with a new optical sync trigger that simplifies things quite a bit.

Compared to the Olympus E-M1
We shot the Olympus E-M1 with the Panasonic 8mm and Olympus 9-18mm lenses quite a bit in an Aquatica AQ-EM1 housing. (We hadn’t brought any macro lenses, expecting to be shooting all large animals.) The 9-18 behind Aquatica’s new SW8 dome was quite impressive, allowing for a nice range of focal lengths from close-focus wide angle to more moderate shots. It was very balanced and rugged, with easy to reach controls. Port and lens changes were easy, and the cam latch made access to the camera literally a snap.

Right now, if you don't need the extremely high ISO shooting characteristics and dynamic range, I think the OM-D E-M1 is a more mature platform with a lot more lenses to choose from. It has easy to use functions and is easy to shoot well and is less expensive.

Compared to the Nikon D800
The D800 has many more lenses available and with the new D810 coming out with even better low-ISOs and other features, I’d give it the edge over the Sony a7. but it is a much larger, heavier system to use, and the Sony a7 was easier to swim with than my D800, certainly for free diving. The same adavantage goes to the D800 for availability of lenses, even more so as it can use old Nikon film lenses that are comparably cheaper than the new Zeiss Sony lenses.

I think the Sony a7 will come into it’s own as new Zeiss and other third-party lenses come out, and it certainly sets a precedent for smaller, lighter professional level cameras to come.

Translate