Buying the best lenses - and ports to use them in, can be a long-term
value investment. Lenses and ports can be used over and over as you buy
new cameras. Buying high-quality lens solutions as you can afford them
is the best plan. However, planning what lenses to buy and what format
to invest in is a very important decision.
Most cameras come bundled with an inexpensive “kit” lens.
These vary in value underwater, but generally aren’t wide enough, focus
close enough, or offer the best sharpness to be used well underwater.
The extra expense of extensions, gears and ports can make these
“inexpensive” lenses poor investments in the long run. Many new
underwater photographers end up selling them after a short while after
being disappointed with the results.
Underwater we generally want three general focal length
ranges of lenses; all with the idea of getting as close to our subject
as we can. Water absorbs light, color and clarity; eliminating as much
of it as we can gives us the best results.
Those ranges are ultra-wide (usually fish-eye), mid-range zoom, and macro.
Ultra-wide fisheye lenses yield the best corner sharpness, due to the
loss of one-third of our field of view underwater, they become
rectilinear. Their “round” corners match the dome ports that replace
much of this loss of field of view. Normal wide-angle rectilinear
lenses, as great as they are above water, generally don’t focus as
close, not have the corner sharpness we desire, due to refraction.
For more information about what lenses we recommend please see our Guide article in our Educatiion section of the store site.
We've developed some great <b>FREE</b> handbooks to help give you a basic guide to many aspects of underwater photography. Titled Guides to Better Underwater Photography these are easy-to-read articles with lots of example photos designed to get you out in the water trying new techniques quickly.
They give you basic concepts and practical tips that will help you get better photos; from how to get started, to more advanced lighting techniques. These are applicable to any type of system from compact to advanced DSLRs, whether you're just starting out, or have more experience - everyone will find some helpful information.
The Handbooks cover many different areas such as Starting Concepts, Composition, Choosing a Lighting System, Close Focus Wide Angle Photography and Maintenance. They are in .pdf format and are an easy way to quickly improve your knowledge and skills.
Underwater Camera Floods: Avoiding the High Water Mark
No subject scares underwater photographers more than having an expensive housed camera turn into an aquarium. Even a bit of water can turn electronics into a corroded mess.
Here are a few general tips on maintenance that should help you avoid finding Nemo in your housing:
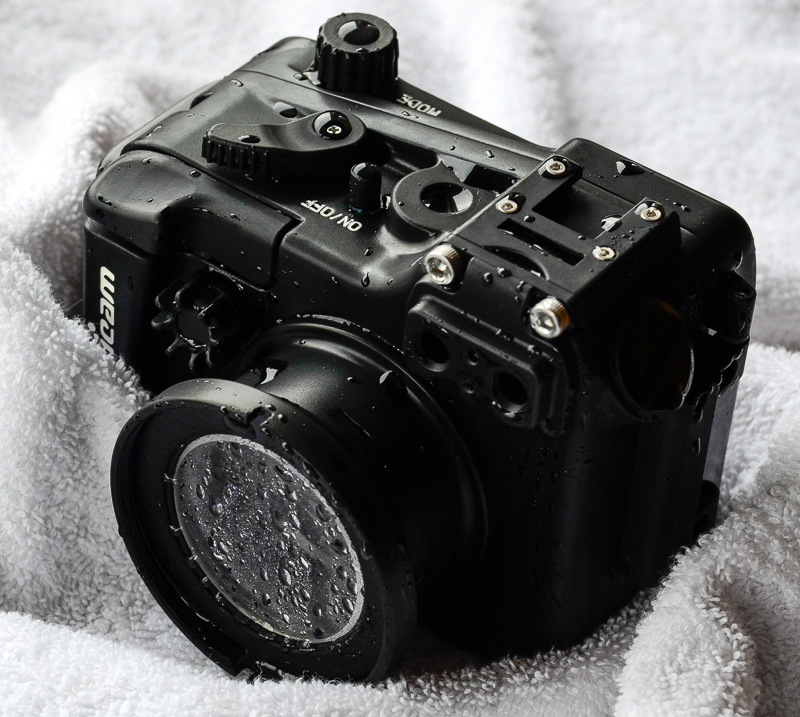
1) Read the manufacturer’s instructions. Please carefully read through it. Housings all vary in care and feeding. For example, housings all have different depth ratings, or have carrying ways of adding a sync cord. Some have all the controls, many have fewer housing controls than on the camera, with some doing multiple actions. Some o-rings are not removable but need to be wiped off. Some housings have controls that are user-serviceable, some don't. Read the manual to find out.
2) O-rings are probably the most important and miss-serviced parts.
In addition to the large, noticeable oring on the back cover, every control has one or two, as well as the ports, and strobe or other bulkheads. Some are black, some are blue or grey, most should be serviced, and some should not.
If you don’t need to service an o-ring, don’t. A sealed o-ring will remain so unless disturbed, such as cleaning. A good example is a port: there is no need to service a port o-ring between dives if it is not removed or changed.
That might seem like a silly question, but it is not always obvious to people what factors are involved in determining how much lighting they need. There are a few things that determine the amount of color saturation and image clarity in underwater photography: depth, ambient light, and water clarity. By adding to the available natural light, you’ll be able to improve the color saturation, sharpness and clarity of your photos.
Underwater Depth and Color
Think about rainbows; they are a vision of light refracted into individual colors through rain (drops of water). So, it’s only natural that when we’re under water, colors change based on the light from above being refracted and absorbed by the water. Each color is a different wave length and energy level, which means that each color absorbs at a different rate.
Colors vanish underwater in the same order as they appear in the color spectrum.
Red – The first to disappear, you may see a noticeable difference in red at 5ft and a complete loss at 15ft.
Orange – The next to go, oranges will be lost at between 25 and 30ft.
Yellow– Next are yellows, which fade at 35 to 40ft
Green – The last to go are greens at anywhere between 50 and 75ft.
Keep in mind the impact of horizontal distance as well. If you are 10 feet underwater, and you are viewing an object that is 10 feet away, you are viewing the light that has reflected off of that object, which has actually travelled 20 feet to reach your eye. At that point, all of the reds will have been filtered out.
Similarly, the light from your system will have to travel 10 feet to the subject you’re shooting and reflect 10 feet back to the camera lens, for a total of 20 feet. Keep this in mind when setting up your shots. The closer you get, the better the color.
Mind Games
The interesting thing is that our brains are wired to compensate for the loss of color. We see a familiar object under water and we see red, because we know it is red, but when we take a photo of it with only natural light, there is no red. So, you actually need lighting when you don’t necessarily think you do.
Where do I start?
To choose the right underwater lighting system, you will have to think about a number of things: What kind of photography will I primarily be shooting, stills or video? What subjects will I be shooting? What will the available light be like where I dive? What kind of camera, housing and lenses will I be using? Why am I taking photos and what do I plan to do with them?
Once you have answers to these questions, you’ll be well on your way to picking out the right components you need in order to put together a lighting system that will take your photos to a whole new level!
Fourteen underwater photographers joined Optical Ocean sales owner Jack Connick on an expedition to the Rock Islands of Palau in late November of 2013. After a long flight, they joined onboard the Palau Aggessor liveaboard on an extended, 10 day cruise.
For those of you who enjoyed my photos and article on the Socorros Islands, please join us on a Photo Expedition there May 23- June 1st 2014.
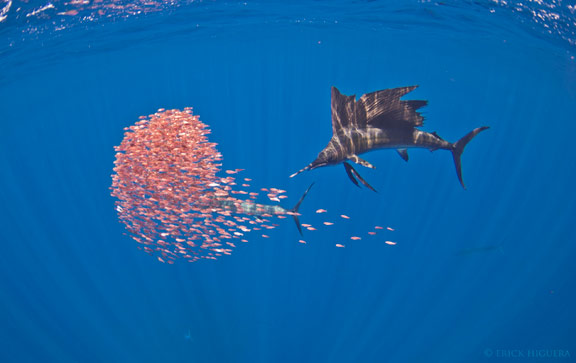
Optical Ocean Sales has organized a trip to go at a perfect time of year to find baitballs; schooling small fish that the predators encircle and feed on. These swirling “balls” of fish are attacked above and below water by sailfish, sharks, and dolphins - and are a mass of action for underwater photography.
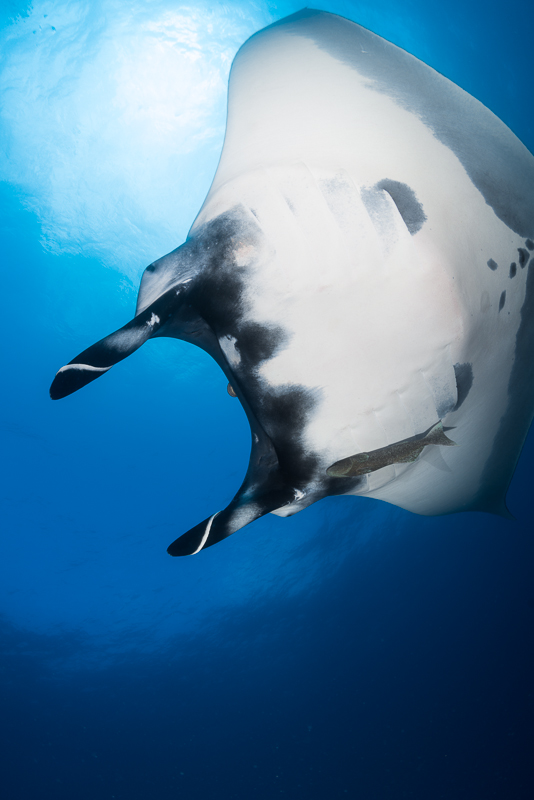
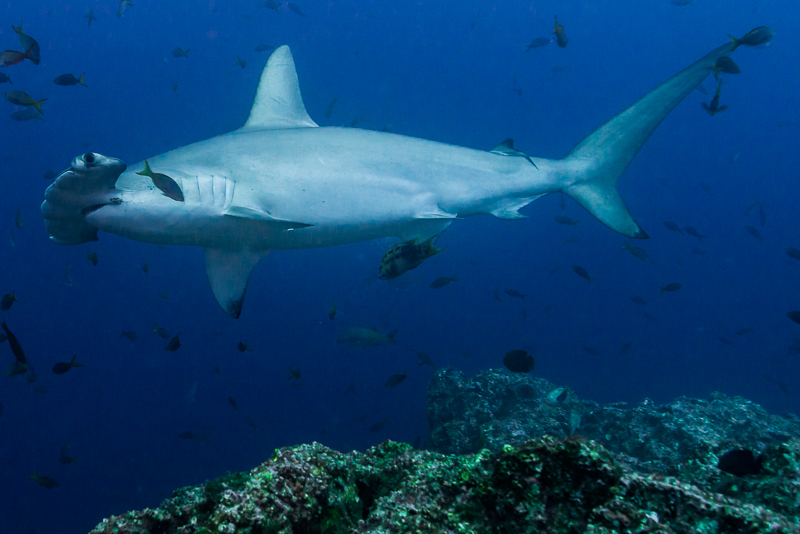
The Revillagigedos Islands, also known as the Socorro Islands, are located 250 miles offshore southwest of Cabo San Lucas, Mexico. They form an oasis for pelagic life amongst their volcanic shores. Many hammerhead and silky sharks, giant manta rays, dolphins, sailfish, schools of jacks and tuna come to feed, mate and get cleaned by small pandemic Clarion Angelfish.
These animals tend to be quite friendly towards divers at times, allowing for fantastic interactions and blue water photo opportunities. This is also the time of year that huge schools of silky sharks are found at Roca Partida Island. These schools can literally block out the sun with their immense numbers.
Our expedition will be on the Solmar V, a luxury liveaboard, which has been sailing these waters for many years, with probably the most experienced and friendly crew around. Best of all, our head guide will be Erick Higuera, a biologist and photographer, who just won the Beneath the Sea “Stan Waterman Award for Underwater Video” for his film “Baja”. He has worked for many years on the Solmar and has extensive experience in the islands.
Both Martin Heyn and myself will be on board and we plan on being available to help you get the most from this fantastic photo opportunity. The cost is $3395/$3495 and is all-inclusive; just get yourself to Cabo San Lucas and we do the rest! Our trip flyer is here. Get more details and sign up today at the webstore!
Went down to Cabo for a few days and then out on the Solmar V to the Soccoros for a week in mid-January. It can always be a crap shoot, and the last trip I made (this is my third) was in January and was spectacular. This time we had wind and cool weather in Cabo for most of the 5 days before the trip.
The islands really had gotten beat up with the hard rain and wind. Fortunately, it had improved as we left. Unfortunately the seas were choppy and the wind was still bad for the first couple of days. The viz, was pretty bad, worst I've seen, normally it's 80-100', but we had more like 20' horizontal and 40' vertical. We couldn't see our fins at Cabo Pearce. Frustratingly, there was pretty decent animal interactions, with lots of hammerheads and even a small Tiger at Canyons, but pretty much impossible to shoot!
Roca Partida had a bit better viz, but lumpy seas and strong currents. There was a small school of Galapagos sharks, but the group scared them away. Normally it's crystal clear and can have an amazing amount of animals.
Finally, we got back to San Benedicto and El Boiler was pretty good, although very hazy, pretty bad in the afternoon. But the mantas were playing and over the course of 8 dives I managed to get some images I liked, by getting within a few feet.
Oh well, that's blue water diving for you. The next couple of week's trip reports afterwards had the viz back and conditions excellent. The crew on the Solmar V is fantastic, the old boat still works out quite well, great food, huge camera table and everyone had fun.
We do have a charter in 2015 in March concentrating on shooting the humpback whales that migrate there then. I'll have an announcement up soon.
Here's a few shots. They were taken with a Nikon D800, Sigma 15mmFE, in a Nauticam NA-D800 housing and Zen 230mm dome port with 2x Sea & Sea YS-D1 strobes. This system is very easy to use underwater as it is neutral and fairly compact for it's capabilities.
Fourteen brave folks came along on our first shop trip to Taveuni, Fiji this October. The long flights from LAX through Nadi to The Garden Island Resort went smoothly, and the friendly staff greeted us with warm welcomes and traditional songs. Our rooms were spacious, with fresh tropical flowers, and spa style bathrooms. We were anxious to get in a check-out dive right away, but the dive shop wasn’t prepared for our arrival, so things were bit disorganized. Having had a lot of experience in running dive trips, I was able to quickly get them back on track.
Diving the rest of the week went more smoothly, with two dives in the morning and one in the afternoon. Rainbow Reef, in the Somosomo Straits between Taveuni and Viti Levu was a short 20 min run out, and had a great variety of dive sites, from top-of-the-reef hard corals, sandy slots, to short/deep walls and caves. Currents were up and down, and really took the experienced guides to figure out. They would be running one way on one side of the reef and reverse direction on the other side. Many times we would drift down, then up and over and come back. The wall entrance to The Great White wall was a swim-through that started at 35’ and came out at 80’, then ended with another short swim-though from 65’ back to 30’. Our dive profiles were pretty zig-zaggy as a result, and it played havoc with some divers’ ears.
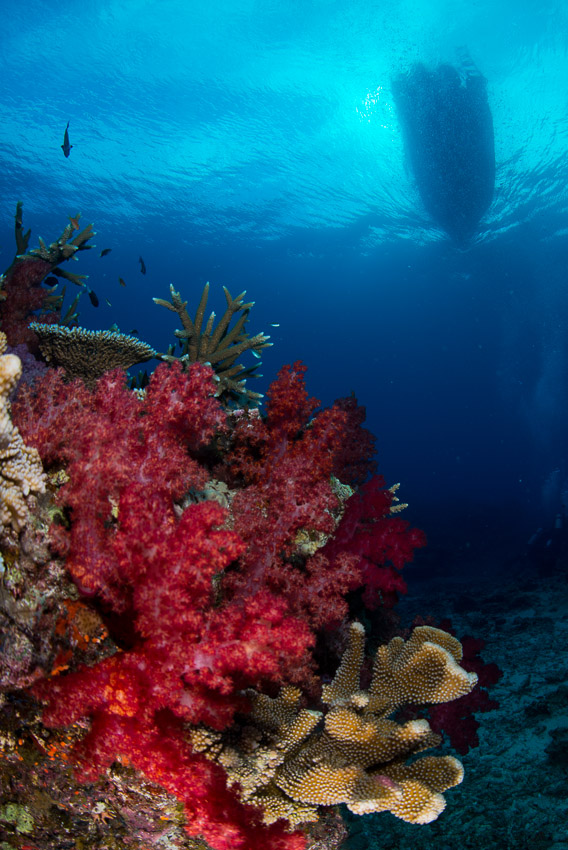
Fiji has amazing soft and hard corals, gorgonian fans and other invertebrates with Technicolor hues. These incredible vistas left all sorts of subject matter for photography. There are also large amounts of small and medium-sized fish, with a few larger ones wandering by from time to time; white-tip and bronze whaler sharks, a large napoleon wrasse, turtles, etc. The Somosomo Straits doesn’t have as many large animals as other spots, but there certainly is a variety of life.
Our surface intervals were a treat: we were able to pull up to a beautiful park on the other side of the straits that had a wide sandy beach and shady palm trees to take a quick nap under. Fresh coconuts that the guides broke open accompanied our snacks and clouds of small fish were fun to snorkel with.
Go Large or Go Home While most photographers who travel are moving to smaller rigs I seem to be moving in the other direction. Having started with a small Sea & sea film rig, I moved through the range of Fuji compacts on to larger Nikon DSLRs. I was very happy with the size and performance of my Nikon D7000 until I had a chance to shoot a full-frame D800 camera. My feeling now is that I don’t mind the increased size if I can get better quality, a much broader dynamic range and have faster performance with better control. It’s all going to go in one bag anyway, so you might as well fill it!
I had brought two complete Nauticam DSLR systems to Fiji, my trusty Nikon D7000 and a new D800 full-frame, thinking to try one against the other – size vs. performance. I also thought that the other folks might want to try one out. However, no one took me up on the offer; they all elected to stick with the cameras they brought with them.
I had rented the D800 body and Sigma 15mmFE and heartily endorse the idea of renting a camera or specialty lens for a trip, especially if you aren’t sure what you want, or won’t use it very often. (I wanted to also look at the new D600 later on.) Moving from cropped-sensor DX to full-frame FX will entail changing several lenses, as most DX lenses simply don’t have enough resolution to use with a 36MP sensor. I plan on trying out professional quality lenses, and buying them only after I have enough experience to justify their expense.
I shot the D7000 the first day, with my usual Tokina 10-17 and then switched over to the D800, shooting with a Sigma 15mm fisheye lens, which for a relatively inexpensive lens is very sharp and focuses much closer than the 16mm Nikon FE. I later added a Kenko 1.4x teleconverter to the Sigma wide angle (while adding a 20mm extension) and really liked the magnified sharpness that the 21mm rectilinear format setup provided. You lose a little image area, but it seems to pull in and focus the fine details of the corals with less distortion at the corners.
The 105VR macro shoots about like the 60mm macro does on DX, with a bit more reach, but subsequently it is harder to lock focus. I would recommend using at least a +5 diopter, maybe more, depending on what you want to shoot. This allowed me to get much closer and eliminate some water between the subjects and myself. I did find that it wouldn’t lock focus at distance on the D800, unlike using it on the D7000, where I like to shoot fish headshots.
One unexpected bonus was how large and bright the full-frame viewfinders are. You not only get a third larger sensor, but you also get a third larger, 100% viewfinder!
The difference in dynamic range, detail and overall image quality with the D800 was much greater than I expected on full-frame, and after reviewing the images on my computer, the D7000, while an amazing camera, just didn’t compare. All of a sudden this became an expensive dive trip!
Where the D7000 is nice and small, the D800 is more of a “voluptuous” size and weight. Surprisingly though, the D800 with an 8.5” dome port, was very light in the water, maybe even lighter than the D7000, while out of water it is a bit of a tank.
But a larger physical-sized rig has advantages. The Nauticam D800 has incredibly nice controls, many moved out to levers, they are spread out and fall right under my hands. Even better when using gloves in cold water. My favorite is the ISO: flip it down, scroll with the main control wheel and pop it back up. With the D7000, and most Nikons, if you select menu item “hold button until released”, it can work the same way, but with a push of a button instead of a lever. It saves having to use two hands to make an ISO or other change.
The one thing I really would miss from the D7000 is the small Zen 100mm dome port, along with the Tokina 10-17 FE zoom lens. You can really cram it into smaller spots when shooting CF/WA. With full-frame, you really have to shoot a larger dome, and I was using the 8.5” acrylic dome on this trip. The advantages of a larger dome are many: better corners and overall quality, the ability to use more wide-open f-stops and the ability to shoot over-and-unders. I would probably switch to a Zen 200mm or large 230mm mega-dome glass port for a little more crispness.
Getting used to shooting in high ISOs was the biggest change for me. It felt really “wrong” to use ISO 800 in the caves, as I’m so used to getting a lot of noise as a result. The D800 and other new FX cameras can be shot at very high ISOs without penalty. ISO 800 looks about like 200 on a DX camera and even higher ISO settings of 1200 or above show little noise. As I progress, I will find that shooting in available light, and maybe experimenting with filters at higher ISOs will be a huge sea-change and will open up a lot of new avenues for shooting shallow water, deeper wrecks, caves, or at night.
“Batting” It All Around Every night at Taveuni we had hundreds of huge fruit bats come home to roost in the trees. Chirping, chattering and the occasional full screams accompanied our nights’ rest. Like the difference in technology between my cameras, the contrasts between the colorful soft corals and primal bats, the modern hotel in its eco-friendly surroundings and the primitive local houses, made for an interesting cultural experience.


 Underwater Camera Floods: Avoiding the High Water Mark
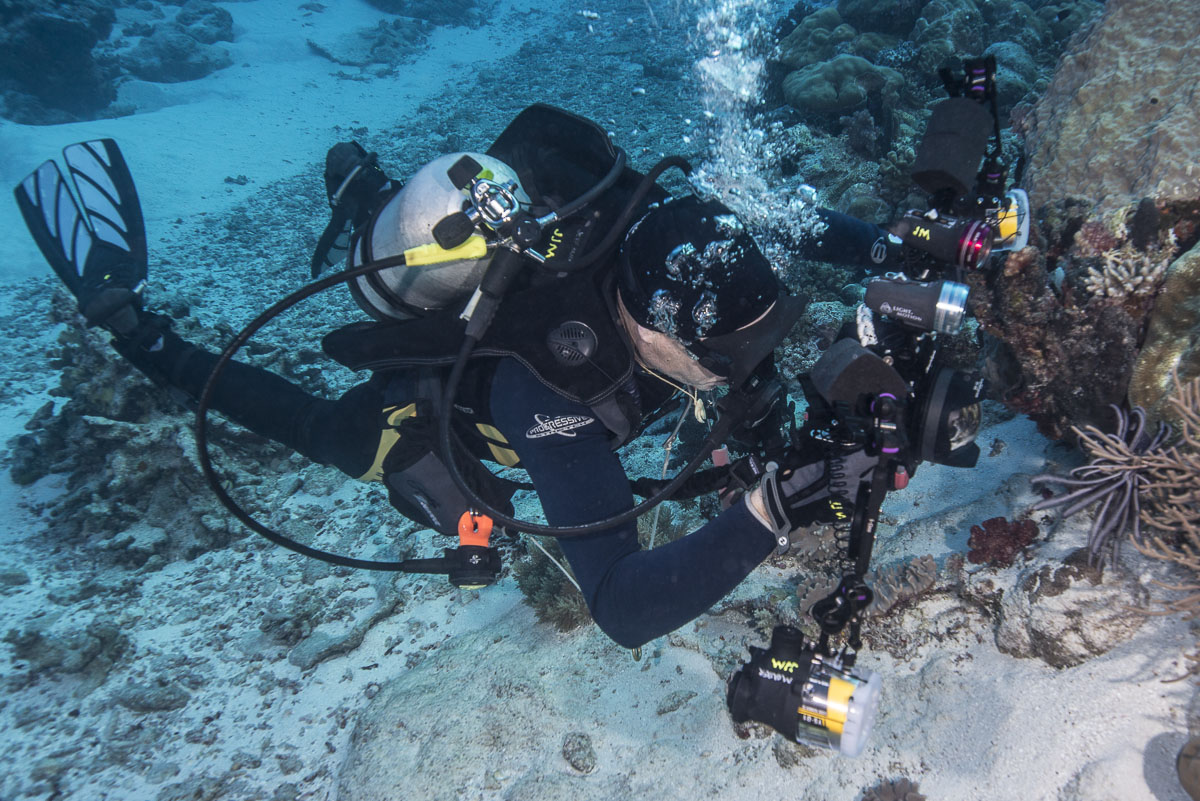 Why do I need a lighting system?
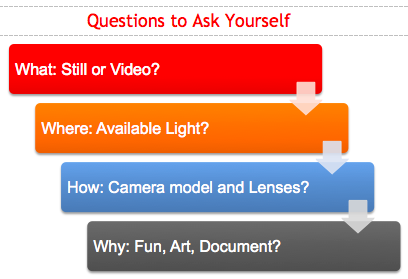

 Fourteen brave folks came along on our first shop trip to Taveuni, Fiji this October. The long flights from LAX through Nadi to The Garden Island Resort went smoothly, and the friendly staff greeted us with warm welcomes and traditional songs. Our rooms were spacious, with fresh tropical flowers, and spa style bathrooms. We were anxious to get in a check-out dive right away, but the dive shop wasn’t prepared for our arrival, so things were bit disorganized. Having had a lot of experience in running dive trips, I was able to quickly get them back on track.
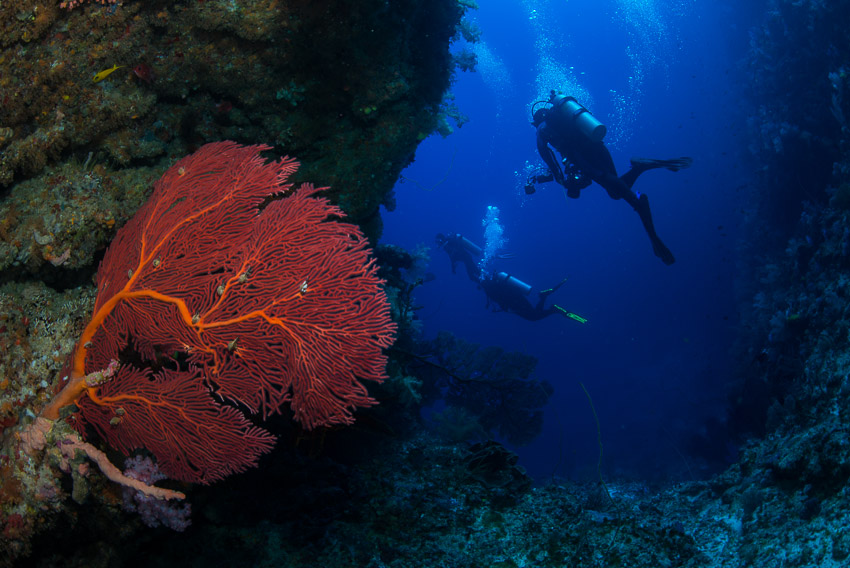 I had brought two complete Nauticam DSLR systems to Fiji, my trusty Nikon D7000 and a new D800 full-frame, thinking to try one against the other – size vs. performance. I also thought that the other folks might want to try one out. However, no one took me up on the offer; they all elected to stick with the cameras they brought with them.
 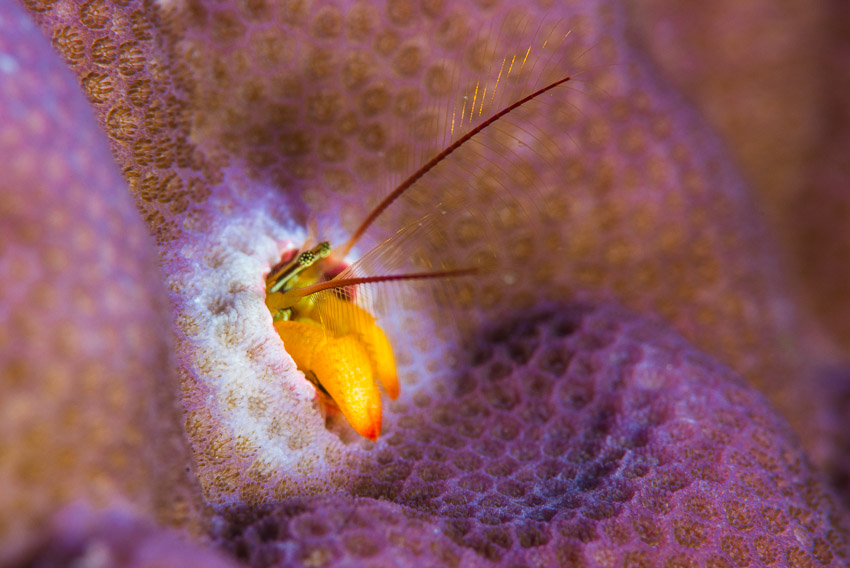 One unexpected bonus was how large and bright the full-frame viewfinders are. You not only get a third larger sensor, but you also get a third larger, 100% viewfinder!