Sunday, July 20, 2014

Kona Variety Pack

We went over to the Big Island for a week of “cillaxing” in February. Staying in a condo, we enjoyed several long drives around the island to visit the Volcano National Park, Hilo and the north end. Weather was up and down, the second night a huge storm blew through with pound rain and wind. But in the tropics the weather changes pretty quickly and we had as many warm sunny days as overcast or rainy.
Denise caught a cold, but I managed to get out with Jack’s Diving Locker on one of their limited load trips one day. They did a great job with only 4 divers on a boat made for 8 or 10, for photographers it’s well worth the extra cost. Unfortunately the swell was running, so options for dive sites were very limited. The first place we went to really had little life, although the old lava flows underwater were pretty interesting.
One the way back we did a dive at Captain Cook’s Bay, where he was killed. Although there were a lot of day boats with snorkelers, we enjoyed the huge coral slopes and pretty had the site to ourselves. It was a nice day on the water with whales rolling around us on the boat on the way back.
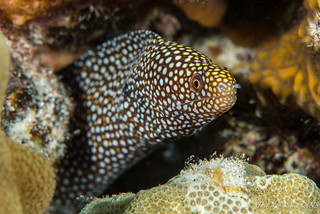
I went up the “Sanctuary - 2 step” for a shore dive one afternoon and really enjoyed it, lots more life and good macro subjects nearly everywhere. Spent quality time with a little jeweled moray. Even spotted a turtle (of course with a macro lens couldn’t get much of a shot). As it is a protected park, the fish life there is abundant.

I also went with Jack’s on one of their famous Manta Night dives. Having done several trips to the Socorro’s with the giant mantas, I wasn’t sure what to expect amid all the hype. But it turned out to be as exciting and fun as it was built up to be. We had something like 29 mantas show up and swoop close up over and around us from all directions, feeding on the krill that had gathered in our lights. I kept getting some weird reflections from some of the bright dive lights in my dome port when I was shooting stills, but my video turned out pretty well. Definitely a must do.
Kona provided a lot of good photo subjects that week; big and small.

Kona Manta Feed from Optical Ocean Sales on Vimeo.

Sunday, July 13, 2014

Good Things Come in Small Packages!

 By Jim Boon
 A DSLR user tries out "going small" with the Olympus OM-D E-M1 and Aquatica housing.

On a recent live-aboard trip to the Sea of Cortez, I had the misfortune of flooding my housing on the second dive of my trip. I was heartbroken at losing my favorite lens and a darn good DSLR camera body. At that very moment, I was looking at the next seven days of being on a live-aboard with twenty other camera-divers and I would not be taking any photos.

As word of my camera flood went around the boat, our trip leader Jack offered to loan me a new Olympus OM-D E-M1 camera in an Aquatica AQ-EM1 housing. Pretty hard to turn down that kind of an offer! I was excited to get my hands on one these new micro four-thirds size cameras in such a robust housing.

The E-M1 camera I was about to use had an Olympus 9-18mm wide angle lens. Since I love shooting close-focus wide-angle, it was a perfect setup for my first experience with this camera.

I spent about an hour with the easy-to-follow owners manual, did some creative wiring of my strobe lights and I was almost ready to get back in the water.

I first noticed how easy I was able to get my camera settings lined up the way I had them on my DSLR. I like to shoot RAW or aperture priority and it was easy for me switch between the two settings. The controls are logical and comfortably located on the body. I took a few test shots on deck and mounted the SW8 wide angle port and extension onto the housing.

Loading the camera into the housing was also a breeze. There are some very positive ‘set points’ for the controls that you must adjust or line up, or the door will not close. Once closed with a single cam-lock, I only needed to make a few pumps to pressurize the housing to get a steady slow green blinking light and all was ready. A couple more test shots with the camera in the housing and then it was time to start diving again.

I have always framed my exposures through a viewfinder, which can be pretty difficult sometimes depending on lens selection, subject angle, lighting and especially current conditions. I was so pleasantly surprised at the ease of being able to quickly compose my photos through the generously sized Olympus electronic viewfinder.

With a firm grip on the Aquatica housing, I could extend my arm into small holes or crevices, compose the shot in the viewfinder and shoot with one hand on the housing and one ‘finger’ balancing me. That is very hard to do with my big DSLR setup. Within ten minutes of my first dive with the camera, I was getting images of quality totally equal to my recently deceased DSLR.

The Aquatica housing is easy to maneuver in the water when positioning for the perfect image. Adjusting the zoom control is a breeze and changing camera settings has positive tactile feedback even when wearing tropical dive gloves.

I was very happy to have had a week of diving with this Olympus/Aquatica m4/3rds combination and then be able to share my observations. It has made a believer out of me that great things do really come in small packages.

Friday, July 11, 2014

Digital Image Software for Underwater Photography

By Jim Garin
Today, it is very easy to take almost any digital camera, take a picture and have it come out pretty well.  Cameras have auto face recognition, smile recognition, pet recognition and more modes than one could possible use.  Even phones can take reasonable images.

But as soon as you take a camera underwater, all bets are off. At most a camera will have an underwater setting…one that only works underwater for bright tropical conditions, and divers aren’t always diving in those places, or with artificial light sources like strobes.

Thankfully, there are two things that can fix this:
  1. Raw images (what the camera actually sees before making a picture you can use).
  2. Image processing software (so you can turn that raw image into a different file type to have on the screen or print).
If you are shooting JPEGs, then almost any software will work, as there is only a very limited amount of adjustment that can be done, but raw is a very different story. Raw images contain all the machine-code information that the camera originally creates (as much as twice) that of a JPEG, and that information can be used to adjust the image to the way you want.  You can adjust, correct and make improvements  on almost any aspect of the picture, and undo all the effects that water has on the image.

Assuming you have a camera that can store raw images, you need software to work with it.  Most cameras come with the manufacturers’ software, but it is very limited, except if you buy a more premium version. While there are dozens of different software programs that can work with raw images, three stand out above all the rest:
  1. Adobe Lightroom This is the original, biggest selling, most used software, one that does everything you need and everyone knows. It’s strength is creating a catalog and adding metadata to photos so that you can find them later.
  2. Adobe Elements  A much less involved (and less expensive) program that has much of the manipulation abilities of Lightroom, but doesn’t work in pro color models, or do the cataloging that Lightroom does.
  3. Silky Pix  As a simple version of this comes with lots of different cameras, this is the next most known software.  However, the professional version is not used that much outside of Japan.
  4. DXO Pro  Newest kid on the block that takes advantage of DXO's huge library of camera/lens testing.
All three of the above programs are easy to learn, and fairly easy to work with, with the exception of Lightroom.  Lightroom software is no more difficult than the other two, but it has it's own filing system for all your pictures.  It creates an image catalog, and if you move photos they will have to be re-linked  You have your choice of either moving the original photos into a new catalog, or leaving them where they are. It can be initially a little confusing to figure out. But it does track everything about the images and saves a complete history of all the changes made with it, so that if you want to roll something back you can at any time. The other two let you use any method you like.

A lot has been written about Lightroom elsewhere, so I will concentrate on DXO’s features.

Thursday, July 10, 2014

A "Newbie" Shoots the Sea & Sea RX100II

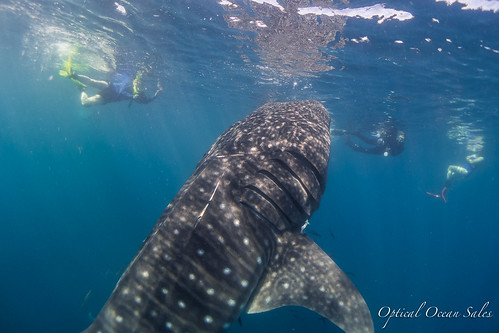
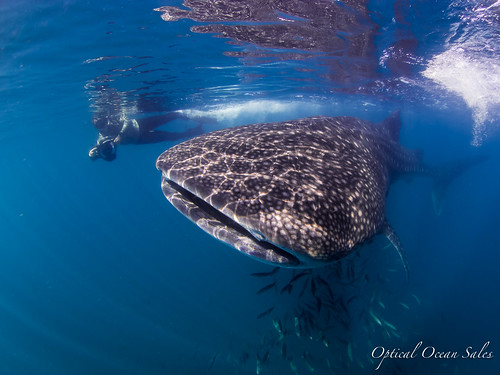
Whale SharkA “newbie” photographers experience with the Sony RX100 II with the Sea and Sea MDX housing.
By David Todd


I am new to underwater photography.
I started a few years back with a borrowed ancient point and shoot and eventually upgraded to a Canon G10 in a Canon polycarbonate housing.
Always the budget minded Scotsman, I piece-mealed my set up; adding a basic tray and arm set on special at a local dive show and eventually upgrading to a Sea and Sea YS01 strobe and a focus light.

Every advance has had its share of learning curves and has eventually turned out to be more than worth the pain in the improvements I have experienced in my photos.

I recently got a chance to shoot the Sony RX100II in a Sea & Sea MDX RX100 I/II housing for a week during a live-aboard photo expedition in Mexico’s Sea of Cortez.
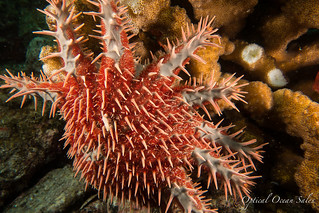
Crown of Thorns CloseupDuring the trip I got a chance to use the set up in a variety of different conditions and arrays.
It was a big step up for me, first time using a new camera, new housing, dual strobes, wide angle and macro lenses and had it’s share of frustrations but in all a huge improvement over my G10 set up.

Big Sensor
This camera is often lauded for it’s huge 20.2MP CMOS sensor and tiny form factor. This translates to big camera picture quality in a pocketable camera. I found the picture quality to be excellent and limited mostly by my inexperience with the camera.

Wide angle
The majority of the images and footage were taken using an additional Fix UWL-28 wide angle wet lens that screwed on to the housings 67 mm threads with an adapter.
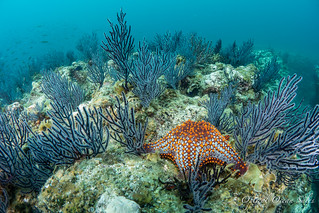
ReefscapeThis was ideal for the large animals and wide-open reefscapes we encountered.
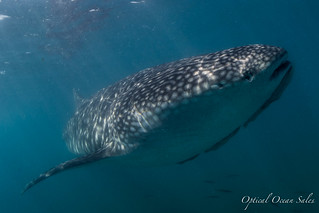
I was able to capture the whole length of 22+ foot whale sharks in the open water and still get up close to reef creatures and show off the background in close focus wide-angle shots. We found the corners to be quite acceptable, and the lens is less than half the cost of the Inon wide angle lens system.
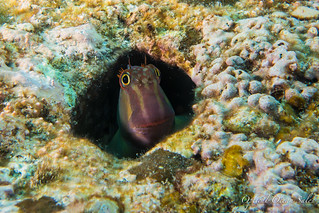
Fang BlennyMacro, what macro?
Like most of the folks on the trip I was geared up for shooting big mantas and sharks and not unfortunately for the wealth of macro opportunities that the area held.
Among the whale sharks and sea lions and huge baitballs lay healthy populations of Barnacle Blennies and Redhead Gobies which I spent a couple of dives trying to capture to no avail until I added an I-DAS + 5 macro diopter to the rig. This helped and I was able to get identifiable shots of these sub-centimeter creatures, if not the micro masterpieces I hoped for.

The Housing
The Sea & Sea MDX RX100I/II housing was a joy to operate. After fighting with sticky buttons on an inexpensive polycarbonate housing, it was a huge relief to use a well-machined sturdy aluminum housing. It feels solid and fits great in the hand with or without gloves. The buttons operated smoothly. The controls were large, well-marked and intuitive to use. Knobs and dials are much larger than other housings, making this the best choice for cold-water divers.

I found myself doing things I would never bother attempting on my old housing: changing settings underwater, reviewing and deleting photos etc.  I was happy to find that the Sea & Sea works so well with the Sea & Sea YS-D1 and YS-01 strobes. I also appreciated the fact that it can fit either the 1st or 2nd generation of the RX100, good news for those who might want to upgrade their camera without incurring the cost of a new housing.

I did discover a couple of idiosyncrasies, I had my screen set to turn off after a couple of minutes to save battery power and had to make to a concerted effort to restart the camera, sometimes pressing the button repeatedly. Another unique feature of this housing is it’s light touch in focusing, unlike some, where you press half way to lock focus and all the way down to shoot, just a light pressure on the shutter lever brings you to that focus point.

The Takeaway
This is a very good camera. It has capabilities beyond way my current knowledge level and is a platform I can see myself growing with as a photographer.

It has great video capabilities. I only used available light and the mpeg 4 setting and was quite happy with the results. I’m looking forward to seeing what using it’s higher res AVCHD settings and adding video lights will add to the mix.


The Caveat
The already well-documented weakness of this camera is its lack of native macro capabilities. For most folks going to clear warm waters to photograph large animals this won’t be much of an issue. Here in the Pacific Northwest where we are swaddled in a rich plankton broth at least ½ of the year, superior macro capabilities are a must have.  Looking forward to trying a more powerful macro lens like the SubSea +5 or +10 diopter.

The Package

Whale Shark

Sunday, June 29, 2014

Do I Really, Really Need a Strobe?

By Bill Van Antwerp
One of the more common questions we get asked, particularly from newer underwater photographers is “I am going to shoot some photos and some video; do I really need a strobe and a focus/video light or can I get buy with just a light?”

To answer the question I set up some tests both in the studio and while diving from the Conception at San Miguel Island (Channel Islands, CA). In the studio setup shown below, I set up a “mandarin fish” in a bed of rocks. The fish is about 2 inches long. For the test in the studio and in the water, I was shooting an Olympus OMD-EM5 in a Nauticam NA-EM5 housing with 2 Sea and Sea YS-D1 strobes using the 12-50 Olympus lens in the Nauticam focus port. For continuous lighting, I used either one or two Light and Motion Sola 1200s, iTorch Pro 6s or Nocturnal Lights M700i.

Figure 1 –Setup in Studio
In the fashion and portrait studio world, LED lighting is becoming wildly popular because with studio LED panels both the color temperature and the brightness can be adjusted on the fly. Underwater we have no such luxury and none of the three lights that we tested had continuously variable intensity levels, but rather two (Nocturnal) or three (iTorch and L&M) levels of brightness.


Figure 1: The setup at left shows two strobes and a single focus light; for the case of two lights the lights were placed where the strobe are shown.

Figure 2 – 1/250th, f/22, ISO 200, 2 YS-D1 Strobes.


Figure 2:
For a baseline, I shot my mandarin fish at 1/250th of a second and f/22 at the native ISO of the camera, 200. The photo above shows the results of this shot with both YS-D1 strobes set at 0 power. A flash meter reading suggested F/18 for this shot and notice the background is a bit dark but overall this is well exposed and notice that the depth of field is quite large.

One advantage of shooting with strobes is that you can have exquisite control of the depth of field by manipulation of the aperture. Below is a shot of the fish at 1/250th and f/6.3 (the minimum of this lens). The strobes were shot at minimum power for the strobe on the left and 1 notch above minimum power for the strobe on the right allowing for adjustment of the darkness of the shadow on the left rear of the photo.

Saturday, June 14, 2014

Sea of Cortez: The Only Sure Thing is Whale Sharks!

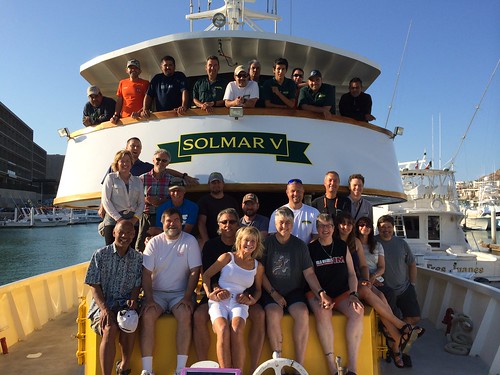
Twenty-one underwater photographers boarded the Solmar V dive boat in Cabo San Lucas, Mexico, on June 23rd expecting to steam the next 25 hours to the Revigadagos Islands, aka "The Socorros", 250 miles offshore. Alas, "Amanda" had other ideas.

Having built up to a Category 4 Hurricane, Amanda was an early violent storm a few hundred miles south of Socorro Island and heading straight for the area we were to dive. Needless to say, the Captain told me that we had to make a big change and head north into the Sea of Cortez. I had taken several trips to the Sea of Cortez ten years ago, but I hadn't enjoyed the long runs to the dive sites from shore. This would be a great opportunity to re-explore it from the comfort of a large live-aboard.

The good news was that the diving there is pretty good, and we could be diving the next morning in Cabo Pulmo.

After a checkout dive, we dropped on the wreck of an old tuna boat, descending right through 9 large bull sharks. Enjoying large schools of grunts and snappers. We explored what was left of the old boat, really just a few large pieces, seeing the large sharks circling in and out amongst our group in somewhat murky conditions.
Continuing north towards La Paz, we dove La Reina and Swanee Rock, both teaming with life. Diving in the Sea of Cortez is very "fishy" with huge schools of grunts, snappers, goatfish and others on nearly every site. Friendly pandemic green morays also greet you from almost every hole. Corals are mostly hard, and not all that colorful, so the aquatic fish life is what you go for. Yellowtail sturgeon fish, puffer fish of every variety, colorful hawk fish, and grouper abound on nearly every site.

However, with a boat load of photographers bent on looking for large animals, we decided to take some chances. Whale Sharks are found in La Paz bay in the Spring; but there had been no reports so far. Would we spend a half-day to cruise the bay and most likely find nothing? A multi-cultural debate raged that evening over dinner, as the French contingent felt the whale sharks weren’t guaranteed, but were finally out voted.

Tuesday, June 10, 2014

Lenses for Underwater Photography

Buying the best lenses - and ports to use them in, can be a long-term value investment. Lenses and ports can be used over and over as you buy new cameras. Buying high-quality lens solutions as you can afford them is the best plan. However, planning what lenses to buy and what format to invest in is a very important decision.

Most cameras come bundled with an inexpensive “kit” lens. These vary in value underwater, but generally aren’t wide enough, focus close enough, or offer the best sharpness to be used well underwater. The extra expense of extensions, gears and ports can make these “inexpensive” lenses poor investments in the long run. Many new underwater photographers end up selling them after a short while after being disappointed with the results.

Underwater we generally want three general focal length ranges of lenses; all with the idea of getting as close to our subject as we can. Water absorbs light, color and clarity; eliminating as much of it as we can gives us the best results.

Those ranges are ultra-wide (usually fish-eye), mid-range zoom, and macro. Ultra-wide fisheye lenses yield the best corner sharpness, due to the loss of one-third of our field of view underwater, they become rectilinear. Their “round” corners match the dome ports that replace much of this loss of field of view. Normal wide-angle rectilinear lenses, as great as they are above water, generally don’t focus as close, not have the corner sharpness we desire, due to refraction.

For more information about what lenses we recommend please see our Guide article in our Educatiion section of the store site.

Saturday, April 12, 2014

New FREE Handbooks: Guides to Basic Underwater Photography

We've developed some great <b>FREE</b> handbooks to help give you a basic guide to many aspects of underwater photography. Titled Guides to Better Underwater Photography these are easy-to-read articles with lots of example photos designed to get you out in the water trying new techniques quickly.

They give you basic concepts and practical tips that will help you get better photos; from how to get started, to more advanced lighting techniques. These are applicable to any type of system from compact to advanced DSLRs, whether you're just starting out, or have more experience - everyone will find some helpful information.
The Handbooks cover many different areas such as Starting Concepts, Composition, Choosing a Lighting System, Close Focus Wide Angle Photography and Maintenance. They are in .pdf format and are an easy way to quickly improve your knowledge and skills.

Translate